Beautiful Angel
To complete this tutorial you will need the following filters:
- Xero Porcelain
- VM Natural Sparkle
You can download filters Here:
Let's begin..:)
Open new image 800 x 600
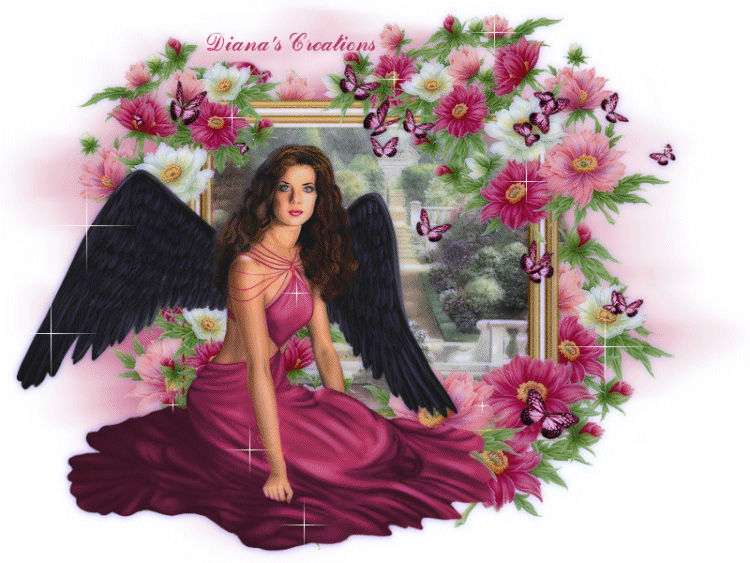
Flood fill using the following color #b63665
Open mask image from supplies.
Copy / paste as new layer onto the image.
Change the masks layer Blend Mode to Screen.
Open flower frame from supplies.
Copy / paste as new layer onto the image.
Open misted scenery image and copy / paste as new layer onto the image.
Place the scenery image behind the frame.
You can do this by going to Layers Menu and choosing Send / Back until you see the image behind the frame.
Position the scenery tube as you see it in my image.
Using the Eraser Tool, erase any remaining areas of the scenery that peek out on the right side of the frame.
Open Angel image from supplies.
Resize to 600 x 578 pixels.
Using the Free Hand Selection Tool, carefully select the area of her dress.
Once you have it selected, go to Adjust / Hue Saturation / Colorize and put the following numbers into the box that will pop up:
241 / 135
Click OK.
Selections / Select None.
Copy / paste the angel onto the image and place her to the bottom left. See my image for reference.
Open Butterflies from supplies.
Copy / paste as new layer onto the image.
Place them just as seen in my image or in a place of your choice.
Now to Layers Menu and Merge All Layers.
Next, go to Effects / Filters / Xero Porcelain and apply using the following settings:
- Softness 50
- Strength 128
- Brightness 128
Rest of the settings at default.
Click OK.
You can add your name and any other text that you wish. This tag makes a wonderful Thank You note....:)
Once you have added the text of your choice, merge all layers once again.
Go to Effects / Filters / VM Natural and choose the sparkle filter.
Apply to the image using the following settings:
- Maximum Size 47
- Red 255
- Green 255
- Blue 255
- Red Color 255
- Random Seed 2
Click OK.
Open Animation Shop.
Copy the image by going to Edit / Copy and paste into AS as New Animation.
Go back to PSP and undo the changes just until the sparkles disappear from the image.
Apply Sparkle Filter one more time, just that this time, change the Random Seed to 30.
Copy the image and paste into AS After Current Frame.
You are now finished....You can now preview, resize if needed and save as gif.
Back
This tutorial was written by Diana's Creations on January 21, 2010
Any resemblance to any other tutorial is coincidental
Property of Diana's Creations
|