Use this bow to keep you place
Use this bow to keep you place
|
|
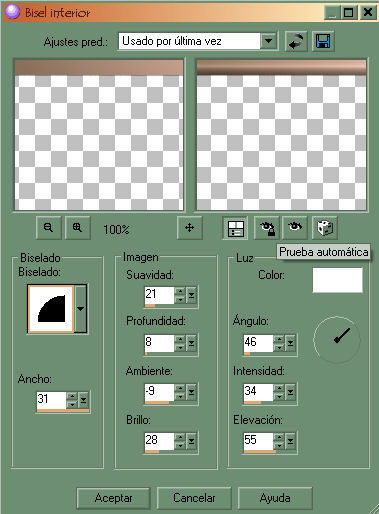
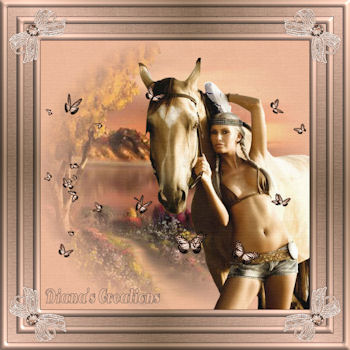
Frame BeautyTo complete this tutorial you will need the following filters: READY - Open new image 600 x 600 Go to Selections Menu and choose Select all. Open scenery image from supplies. Merge the scenery with the background that comes with it. Now copy / paste the scenery image Into Selection. (onto the new image). Next to Selections / Select None. Open woman image from supplies. Note: The woman image comes with a selected watermark. Resize the woman image to 400 x 565 pixels. Copy / paste the woman as new layer onto the scenery image. Place her to the lower right side just as you see in my image. Open butterflies from supplies. Go to Adjust Menu and choose colorize. Put 15 - 90 into the box that will pop up and click OK. Copy / paste the butterflies onto the image. Using the Eraser Tool, erase the butterflies that are on the horses face and also the one's that are on the woman's chest. Actually you can accommodate the butterflies to your liking..:) Now add your name or any text you wish to the image. Once you have your text added, merge all layers. Now to Effects / Filters Unlimited and choose the Fine Canvas Texture. You will find this in Paper Textures. Apply to the image using the following settings: Intensity 64 Lightness 87 Click OK. Make a gradient by setting your foreground color to #8a6f5a and background color to: #ebc2b0 Open Material Properties and click on the gradient tab. Select the gradient with the colors we just chose and set it as your foreground color. Go to Image / Add border and add border 1 pixel wide using color black. Add border 15 pixels wide using color white. Using the Magic Wand, select the border and flood fill it with the gradient. Go to Effects / Inner Bevel and apply using the settings as seen below: Selections / Select None. Add border 1 pixel wide using color black. Add border 20 pixels wide using color white. Using the Magic Wand, select the border and flood fill with the gradient. With the border still selected, go to Effects Filters Unlimited and apply Fine Canvas Texture using the following settings: Intensity 156 Lightness 87 Selections / Select None. Add border 1 pixel wide using color black. Add border 15 pixels wide using color white. Using the Magic Wand, select the border and flood fill with the gradient. Go to Effects / Inner bevel and apply using same setting as before. Selections / Select None. Add border 1 pixel wide using color black. Add border 20 pixels wide using color white. Select the border using the Magic Wand and flood fill with gradient. Go to Effects Filters Unlimited and apply Fine Canvas Texture using same setting as with the last one. Selections / Select None. Add border 1 pixel wide using color black. Add border 15 pixels wide using color white. Select the border using the Magic Wand and flood fill with the gradient. Go to Effects / Inner bevel and apply using same settings as before. Selections / Select None. Open corner bow I included in the supplies. Resize to 140 x 140 pixels. Go to Adjust Menu and choose colorize. Colorize using the same setting we used before. Copy / paste the bow as new layer onto the image and place it to the top left corner. Go to Effects Filters / Simple and choose the Top Left Mirror and Just click OK. Merge layers and you are finished....:) Have a very beautiful...day/night...:) This tutorial was written by Diana's Creations on August 7, 2009 |