 |
Gothic Beauty
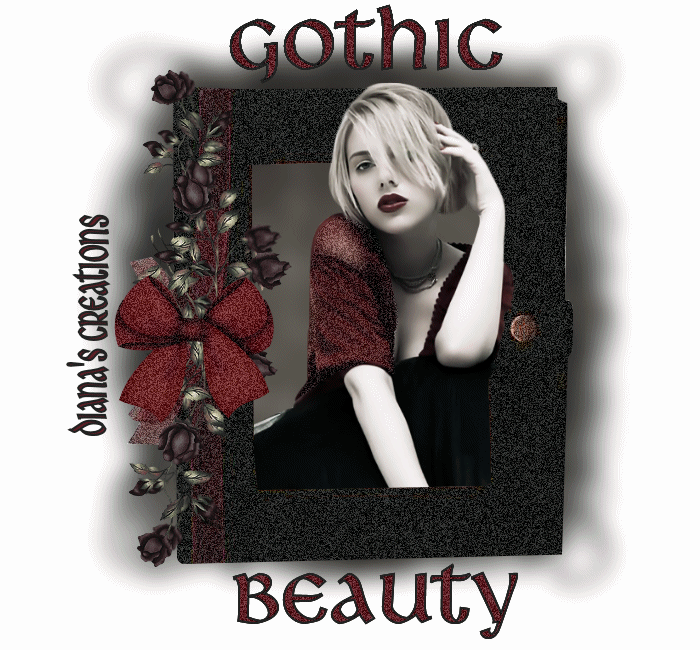
-Ready to Start- All images used in this tut where supplied to me through group shares. Open new image 700 x 650. Flood fill with white. Open black mask, and frame from supplies. Copy and paste the black smoky mask onto the image. Now copy and paste the book frame onto the image. Open woman image from supplies and place her to the back of the book frame. You can do this by going to Layers Menu and choosing Send Back. Using the eraser tool, erase only the bottom sides of the lady that are peeking on the outsides of the book frame. Once erased, go to Layers Menu and duplicate the lady image 1 time. Bring the duplicate layer to the front by going to Layers Menu and choosing Bring To Front. Now using the eraser tool, erase the bottom part of the lady. see my image for reference. Now open Black Roses from the supplies. Rotate the roses 90 degrees to the right and copy/paste as new layer onto the image. Place the roses to the left bottom side of the book frame. Go to Layers Menu and duplicate the flowers once. Using the Deform Tool, turn the flowers around so they are in an the opposite direction of the other flowers. Go to Image/Mirror and then place the flowers to the upper right of the book frame. Open small bow image from supplies and copy/paste as new layer onto the image. Place the bow to the left side of the frame. See my image for reference. Now click on the text tool and with the foreground color set to #222222 and the background color set to #5e1f27 write out the word 'Gothic' and place it to the top of the image. Note: I used font type Libra BT, Font size 72 outline width 0.2. Again, using the text tool write out the word 'Beauty' and place to the bottom of the image. Once you have the text in place go to Selections Menu and choose Select All. Then again to Selections Menu and choose Float. You should now see only the text selected. Go once more to Selections Menu and choose Selections/Modify/Contract and enter 2 in the box that will pop up. Next, go to Effects/Filters/DSB Bright Noise and apply using the following settings: Intensity 40 Direction Mix Click OK and go to Selections Menu and choose Select None. Now click on the book frame layer so it becomes the active layer. Go to Effects/Bright Noise and apply the same settings you used before. Click on the little bow image and apply the same Bright Noise settings to this one also. Now choose the copy of the lady image and using the Free Hand Selection tool, select the area of her sleeve. Once selected, apply the Bright Noise with the same settings as with the others. Now merge all layers and Open Animation Shop. Copy the image you just created by going to Edit/Copy and paste it into AS as new animation. Go back to PSP and undo all the changes until the noise effect you applied to the text disappears. The text should remain selected. Apply the Noise filter to the text once again but this time click twice on the Mix button. Go to Selections/Select/None. Now apply the noise the same way to every other element as you did the first one's. Just remember that this time you will need to click twice on the mix button every time. Once you have applied the noise filter to the rest of the elements, merge all layers. Copy the image by going to Edit/Copy and go over to animation shop and right clicking on the image that is currently there, paste this one after current frame. You can now preview the image and save as gif...:) |
|
Any resemblance to any other tutorial is coincidental Property of Diana's Creations |