 |
Orange Beauty
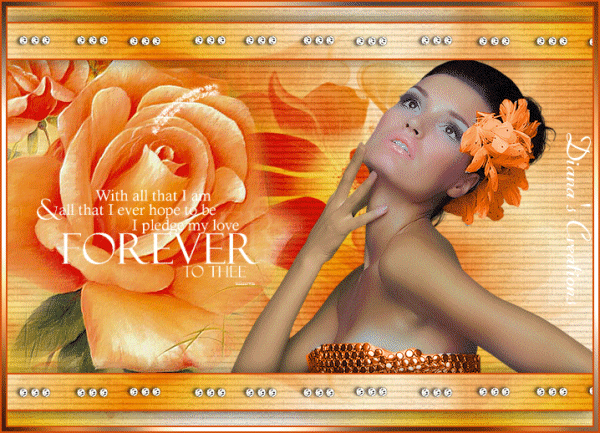
-Ready to Start- To complete this tutorial you will need the following filters: - FM Tile Tools / Blend Emboss - Filters Unlimited. - Graphics Plus / Cross Shadow You can download filters HERE All material used in my tutorial was supplied to me through various group shares. Open new image 700 x 500 Lets make a gradient by setting our foreground color to: #e36a05 and background color to: #f7e3b4 Open materials properties and click on the gradient tab. Select the gradient we just made and set it as Set the angle to 50 and repeats to 3. Flood fill the new image with this gradient. Go to Layers Menu and add a new Raster Layer. Now to Selections / Select all. Open mask image from supplies and copy / paste it into selection. Set the mask layers Blend Mode to Overlay. Selections /Select None. Merge layers Down. Go to Effects / Filters Unlimited and choose Striped Paper Coarse. You will find it under Paper Textures. Apply using default settings. Note: my default settings are Intensity 74 Lighting 87. Open beautiful flower image from supplies. Copy / paste as new layer onto the image and place to the left side. See my image for reference. Go to Effects / Filters FM Tile Tools and choose Blend Emboss. Apply to the flower using default settings. Open woman image from supplies. Go to Image / Mirror so that she is facing the opposite direction. Using the Free Hand selection tool, carefully select the area of the flowers she has on her head. Once you have that selected, holding down the Shift Key on your keyboard, carefully select the area of her dress. Note: holding down the shift key will permit you to select multiple areas of an image at the same time. Once both areas are selected, go to Adjust Menu and put 18 and 244 into the box that will pop up. Click OK. You should now see the woman's dress as well as the This last step is not all that easy to do specially selecting the area around the hand. Now once the dress and flowers are colorized go to Selections / Select None. Copy / paste the woman onto the image and place to the right side. You will need to pull her down just a bit until you see you positioned as you see in my image. Open Orange Borders from supplies. Copy / paste as new layer onto the image. Place the border to the top of the image. See my image for reference. Go to Effects / Drop Shadow and apply to the border using the following settings: Vertical - 2 Horizontal - 2 Opacity 70 Blur 30 Click OK. Go to Layers / Duplicate then to Image / Flip. You should now have both borders in place. Erase the area of the woman that shows on the bottom of the lower bar. See my image for reference. Now open Diamond Strip from supplies. Copy / paste as new layer onto the image. Place the diamond strip to the top of the orange border. Now just duplicate it as many times as you need by going to Layers / Duplicate and place the duplicates as you see them in my image (on top of the bars). Open word art from supplies. Resize to 300 x 114 pixels. Copy and paste as New Selection onto the image. Note: make sure you have it in the place it go's before letting go. Now once you let go of the text and since it was pasted as new selection, you should see the word art selected. Using the Paint Brush Tool, paint over the word art using color white. Once painted go to Selections / Select None. Place your name on the image and merge all layers. Go to Image Add borders and add border 2 pixels wide using color: #d54e0c Add border 5 pixels wide using color white. Using Magic Wand, select the border and flood fill with the gradient color. Go to Effects / Filters / Graphics Plus and apply Cross Shadow using default settings. Add one more border 2 pixels wide using color: #d54e0c Open Animation Shop. Copy the image by going to Edit / Copy and paste into AS as New Animation. Duplicate the image 23 times so that you have a total of 24 frames. Place the slider all the way to the left until you see frame 1. Go to Edit Menu and choose Select all. Now go to File Menu and open the animated heart I included in the supplies. Delete the first black frame that comes with it. Go to Animation Menu and choose resize. Resize the heart animation to 350 x 350 pixels. Go to Edit Menu and choose Select all. Place the slider of the heart animation all the way to the left until you see frame 1. Now click on the heart animation in frame 1 and drag it onto the woman image placing also in frame 1. Position it as you see it in the image below before letting go. Your image is now finished. You can now preview, and save as gif.
|

|
Any resemblance to any other tutorial is coincidental Property of Diana's Creations |