 |
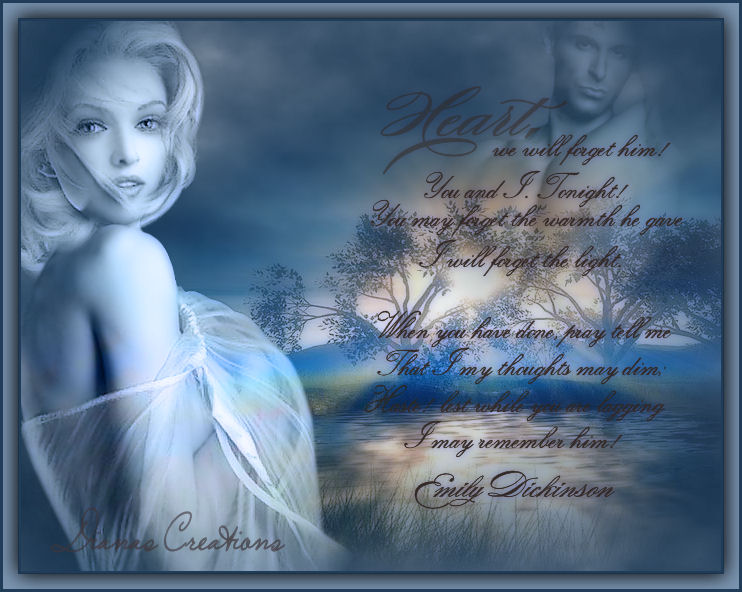
We Will Forget Him
-Ready to Start- To complete this tut, you will need the Mura Meister Cloud Filter. You can download it here: You will also need the Xero Porcelain Filter. You can download it here:
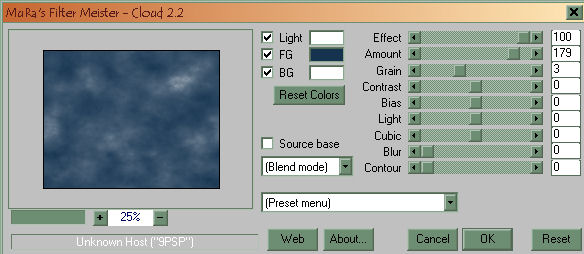
Open new transparent image 700 x 550 Flood fill using the following color: #15334f Go to Effects/Filters/Mura Meister and choose the cloud filter. Apply to the image using the settings a seen below:
Open misted scenery image from supplies. Copy/paste as new layer onto the image. Pull the image just a bit down. See my image for reference. Now open the beautiful woman image from supplies. Copy/paste as new layer onto the image. Go to Image/Mirror so that she faces the opposite direction and place her to the left side of the image. Change the woman layer Blend/Mode to Luminance.(Legacy) Open man tube from the supplies. Copy/paste as new layer onto the image. Go to Image/Mirror so that he is facing the opposite direction and place him to the upper right side of the image. Change the man layers Blend/Mode to Luminance (Legacy). Lower the man layers opacity to 44 %. Now open word art from supplies. Copy/paste as new layer onto the image. Place the word art to the right side of the image. Go to Layers Menu and merge all layers. Next, go to Effects/Filters/Xero and choose the porcelain filter. Apply to the image using the settings as seen below:
Now go to Image/Add Border and apply border using the following settings: Width 3 Color #203c58 Click OK. Again to Image/Add Border and apply using these settings: Width 15 Color #7a94b0 Now using the Magic Wand, click on the border you just created. Go to Effects/Drop Shadow and apply using the following settings: Vertical 3 Horizontal 3 Opacity 70 Blur 30 Click OK. Once again to Effects/Drop shadow and apply using these settings: Vertical -3 Horizontal -3 Rest of the settings same as above. Go to Selections Menu and choose Select/None. Add one last border using these settings: Width 3 Color #203c58 |

|
Any resemblance to any other tutorial is coincidental Property of Diana's Creations |