“How to”
Make a Blinkie Blink!

You can get the blinkie Here
This tutorial will give you basic knowledge of how to make a blinkie blink
This was written using PSPV9, but any version should work.
Supplies: The blinkie used in this tutorial is called: large blinkie~ieg , and the artist is unknown.
If you are the creator of this blinkie, please advise so proper credit can be given.
For this tutorial we are using TWO COLORS.
Open up PSP
Open up Animation Shop (minimize for now)
Ok – Let’s do it!
In PSP:
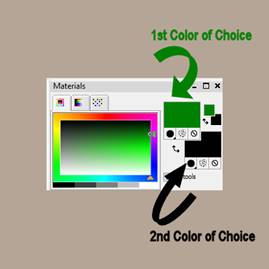
Pick your 1st Color of Choice (place the color in your foreground color palette)
Pick your 2nd Color of Choice (place the color in your background color palette)
This is what my Color Palette looks like now:
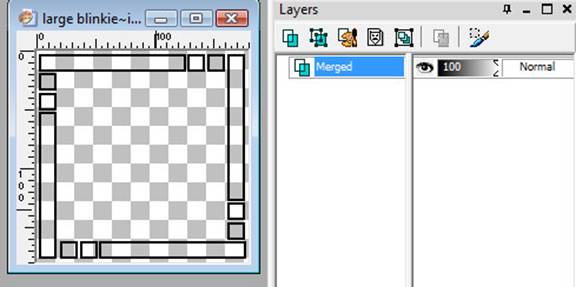
In PSP, open up your Blinkie
This is what my blinkie looks like (Remember it doesn’t matter what blinkie you choose, the technique will still be the same):
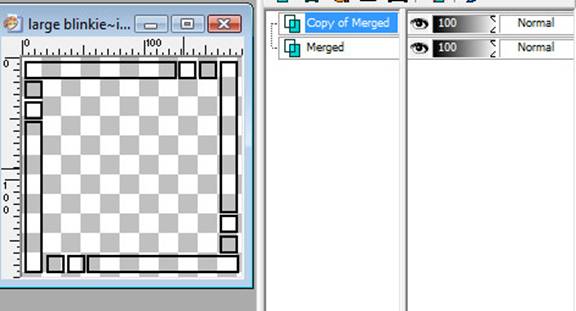
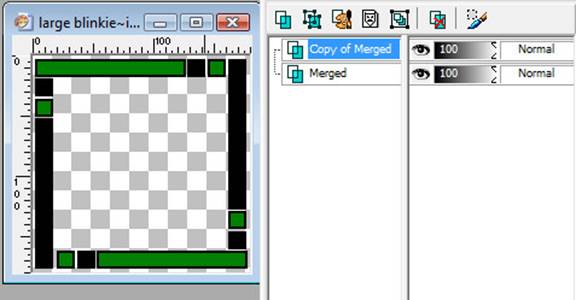
Duplicate your layer one more time (Layers/Duplicate)
You will now have two layers. Two layers because we are only using two colors on this blinkie.
You should now see this:
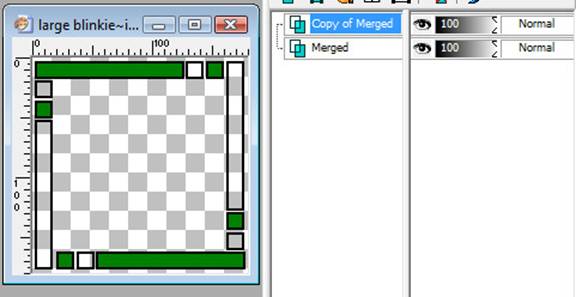
Activate your top layer
Grab your flood fill tool, and flood fill EVERY OTHER BOX with your 1st color of choice (your foreground color)
Notice – my first color of choice is Green (See below)
Your top layer should now look like this:
IMPORTANT!
STAYING ON YOUR TOP LAYER
Flood fill the uncolored boxes with your 2nd color of choice (your background color).
Note: My 2nd color of choice is Black
Your TOP layer should now look like this:
Important: Please remember what your 1st color of choice was (foreground color) and your 2nd color of choice was (background color). (My first color of choice is green and my 2nd color of choice is black).
Now – Close the eye of your First Layer: (See below)
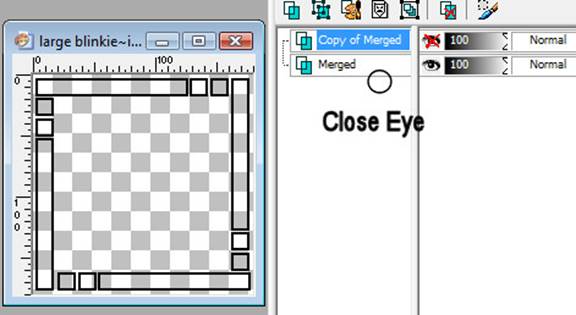
Notice how you no longer see colors. That is because we closed the eye of our first layer. Don’t Worry!
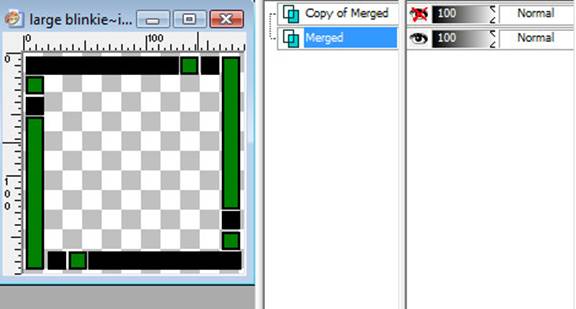
Now we are going to flood fill the BOTTOM LAYER using our 2nd choice color first (your background color):
Activate your BOTTOM LAYER.
Flood Fill your bottom layer starting with your background color (2nd color of choice), and your 1st color of choice (foreground color) second.
Like this:
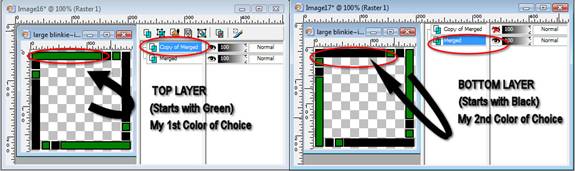
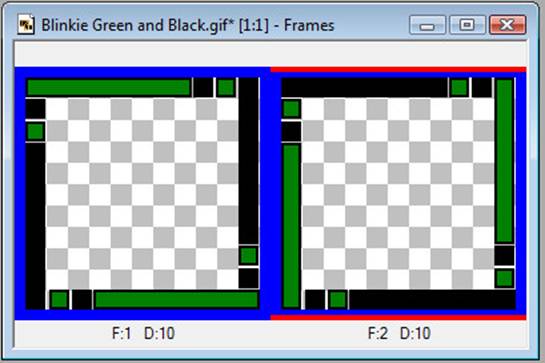
This is how my layers now look. Notice how the image on the left (my top layer) starts with green in the upper left hand corner – and the image on the right (my bottom layer) starts with black in the upper left hand corner.
(You can check yours by closing the eye one layer at a time)
We are now ready to make this blinkie blink!
In PSP:
Activate your TOP Layer
Edit/Copy
In Animation Shop:
Edit/Paste as NEW animation
In PSP:
Activate your Bottom Layer
Edit/Copy
In Animation Shop:
Edit/Paste AFTER Current Frame
In Animation Shop:
Click on: View/Normal Viewing (See below Screen shot)
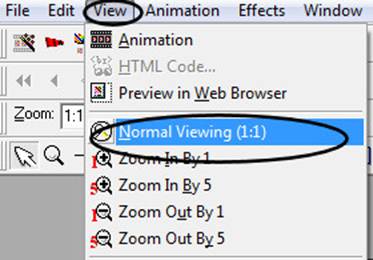
You should now see this:
In Animation Shop click on View/Animation
And watch that blinkie blink!
Going a little too fast?
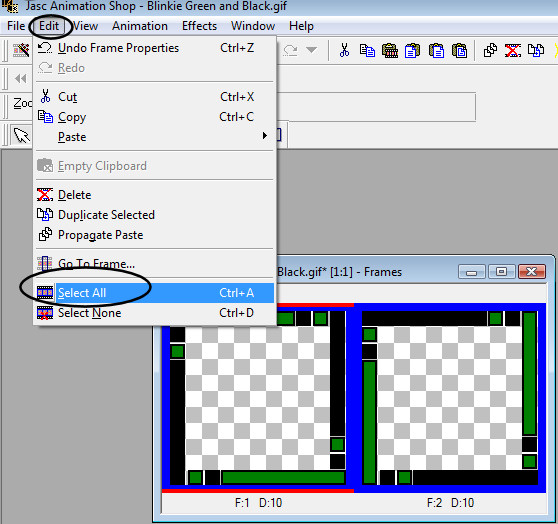
Change your Animation Speed (See Screen Shot)
Then click on Animation/Frame Properties (See below)
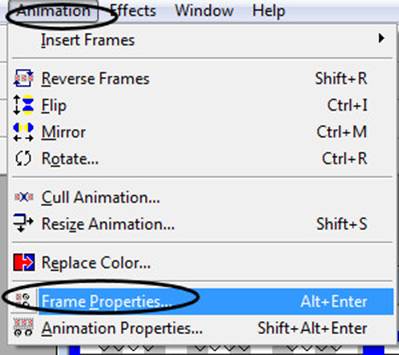
You will now see this:
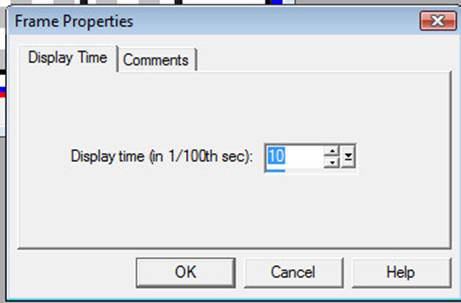
Change your Speed from 10 to 25 (or whatever your preference is)
Click on View/Animation – and watch that Blinkie Blink!
See – it is as easy as 1 & 2!
Quick Reference Tip: The main things you really need to know about blinkies are these 2 things:
- You need one layer for each color you plan to use. (3 colors = 3 layers of your blinkie)
2. On all three layers you alternate your colors (say you chose: purple, black and blue)
a. On top layer you would flood fill your first blinkie box with purple - next box with black next box with blue (until all the boxes on the top layer are filled in)
b On middle layer you would flood fill your first blinkie box with black - next box with blue and the next box with purple (until all the boxes on the middle layer are filled in)
c. On bottom layer you would flood fill your first blinkie box with blue, then purple and black (until all the boxes on the bottom layer are filled in)