All About Tubes
All About Tubes
~~~~~~~~~~~~~~~~
Tutorials Index
This tutorial was written by
Cathie for PSP Times Three.
This tutorial will give you some information about tubes and
how to save, export and apply them. It will also explain a little about pspimages.
Preparations:
1. Use this image - pointing finger - to mark your place. Just drag it along as you read each line.

2. Open your PSP.
3. Go to the bottom of your Windows desktop. Look at your taskbar which is located to the right of your Start button. It lists all the windows folders and programs you have open. Look for an empty spot. Right Click and hold mouse down on that blank space.
4. A menu pops up. Select "Tile Windows Vertically". You should now have the tutorial and your own PSP open side by side. This will aid you in following the tutorial.
5. Download the pspimage
HERE:.
Overview
The difference between a pspimage and a tube is that a tube is the result of exporting a single layer transparent image through Paint Shop Pro program. This program will copy your image and save it as a tube with a new file extension of .tub. All PSP Images have an extension. You will find at the very end of the file name a dot and the word/s psp or pspimage. The same goes for GIF's and JPEG's. Each has its own file extension name.
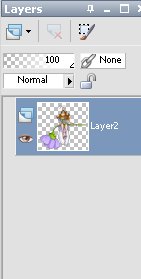
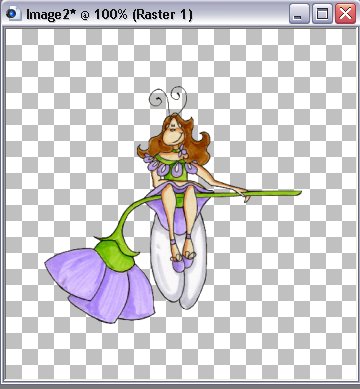
We are going to use the pspimage that is attached to this tutorial as an example of how to save it as a picture tube. Right now it is not a tube. It is a basic pspimage.
Let's Begin:


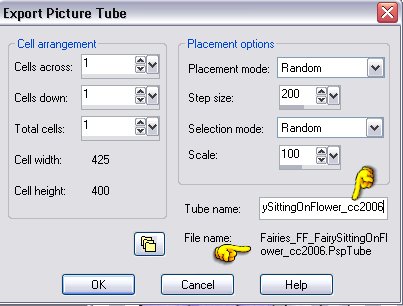
Next, looking at the image below you will notice A, B, and C. Sometimes you may have an image that has a bunch of different images on one layer. Each image is referred to as a "cell". Imagine an image with 9 bears and each one has a different pose. They will most likely be placed 3 bears going across and 3 going down. You use those cell boxes to tell the tube program that you want to divide those into one each. So you would place 3 in the across box (A) and 3 in the down box (B). Then the total of 9 will show in the bottom box (C). When you save this type of tube each time you use it you will get a random image.
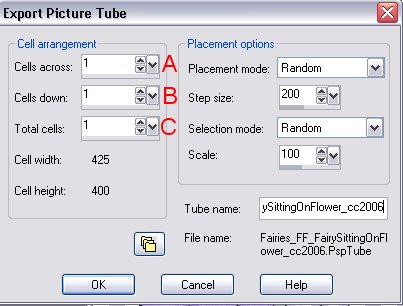
You can set those to continuous if you like. That means when you apply the first cell the first image will appear. Then when you apply the next time the second image will appear. It will go in order instead of random. To set the tube for this you will need to change the placement mode to continuous:

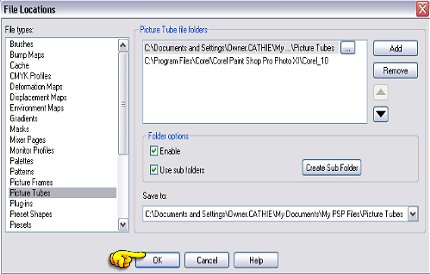
Next, where do you want to save your tube? It is recommended you do NOT save them to the program's tube folder. The reason being is if down the line you decide to purchase a newer version of PSP then you would have to copy and move all those tubes. Too much extra work! Also if your PSP program crashes and you have to reinstall it you will have lost them. Therefore the best solution is to go to your "My Documents" folder and look for a folder called "My PSP Files". If you do not have one then create one. Open the folder and look for a folder called "Tubes" or "Picture Tubes". If you do not have one then create one. That is where you want to save your tubes! Now, look at the shot below. You will see "NOTE and a black arrow" - That is pointing to an icon of folders. Click that icon and your "Files Locations" will pop up.

Once the Flie Locations box pops up look on the left side and locate Picture Tube. Make sure that is highlighted. Then on the right side you will see a tab "Add". Click that and a browser box will appear for you to search for the folder where you want to save the tube. As stated above look for My PSP Files and then for Tubes or Picture Tubes. Select that folder, click okay and the path to that folder should appear in the box. Make sure it is highlighted:

Then go midway down and check the 2 boxes. Enable will set the path to use and Use Sub Folders will open all folders you might have in the Tubes folder.

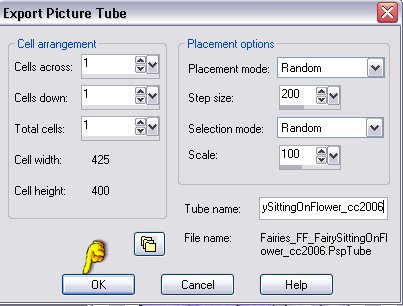
Click OK and return to your export picture tube box.
Click OK and your tube will be placed in the correct folder!
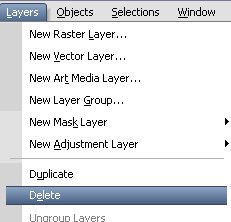
Close out the image that is on your workspace. It will ask if you want to save the changes. Tell it NO. It will then save in its original form with the 2 layers.


That's all there is to exporting a PSPImage as a Picture Tube. Once you apply the tube to your transparent image you can go ahead and create your tag!
~~~~~~~~~~~~~~~~
Any similarities to other tutorials is merely a coincidence.
©
PSP Times Three
~January 2007~