Let's learn how to do a simple frame or border using selections. You can use the "Add borders" tool, but sometimes you don't want to exceed the original size of your graphic. So, you can use selections to do a cute border. I'm using a simple square to show you:

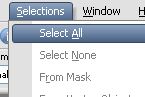
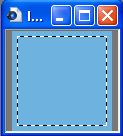
With your graphic open, go to Selections, select all. You must have the background layer as your active layer:
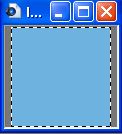
Apply. You'll see this (the marching ants shows you the area you have selected):
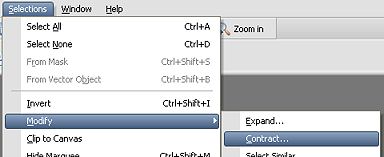
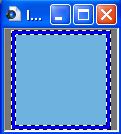
Then, go to Selections again, choose Modify/Contract. In the dialog window you can write the number of pixels you want for your border.
This is the result. I'm using 5 pixels:
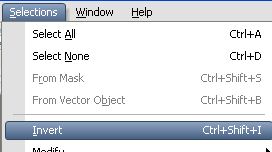
Go to Selections/Invert:
Add a new layer (this will allow you to apply effects on the border) and fill the double marching ants frame:
Deselect, and you are done! You can add all kind of effects to your border. In the first sample, I've added a cutout. In the second one, inner bevel and drop shadow. The third one is a mosaic: