Let's take a look to the fill tool (the little bucket *Ü*). We know how to use it with plain colours and patterns, but what about textures? Textures are really great to creat wonderful effects in all kind of graphic styles, even pixel painting. Let's learn how to use them to make a tile like the pink one here.
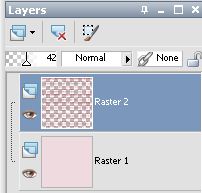
Open a new image. I'm using 81 x81 pixels, choose a light colour and fill the layer:

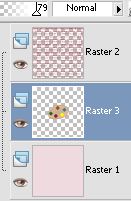
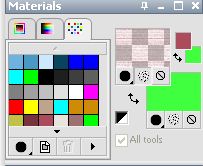
Add a new raster layer and choose a darker colour. Go to the Materials palette, and check the middle button. That's the textures one:
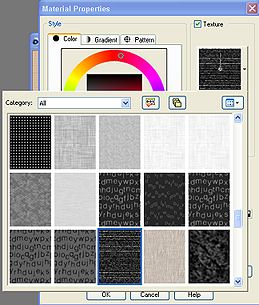
Click on the texture window to choose the one you want. Here, we are going to use Lines. Roll the textures until you find it, then click OK:
Fill the new layer with the darker textured colour. Low the layer opacity like I did here:
Merge visible, save as jpg or gif (I prefer gif), and you are ready! This is how the tile looks (I've added a border to show it better). For the second sample I've inverted the colours: the darker one is the fill and the lighter the textured:


Let's play a little more with the angle and the size of the texture:
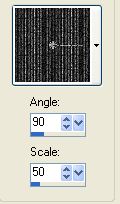
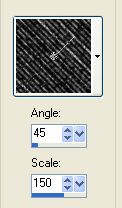
This is what you get with each one of the changes:


One more? You can "insert" a little graphic between layers, and also low the opacity of the layer, like here: