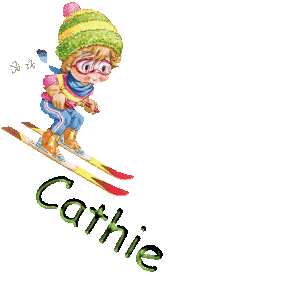
Animated Skiier Tag
This tutorial will show you how to create an animated
tag. It is long because there are many screen shots with
step by step instructions. Most of you who already have experience
with PSP will not need the specific steps included here. Those
who are beginners and want to learn do need them.
Preparations:
1. Open your PSP.
2. Go to the bottom of your Windows desktop. Look at your taskbar which is located to the right of your Start button. It lists all the windows folders and programs you have open. Look for an empty spot. Right Click and hold mouse down on that blank space.
3. A menu pops up. Select "Tile Windows Vertically". You should now have the tutorial and your own PSP open side by side. This will aid you in following the tutorial.
4. Download the psp image
HERE:.
Part 1
-
1. Extract the image from the zipped folder then open it in PSP
- 2. Using your keyboard, hit Shift D (to duplicate) and close original
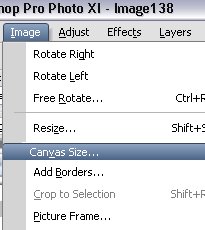
- 3. Resize Canvas by going to Image/Canvas Size
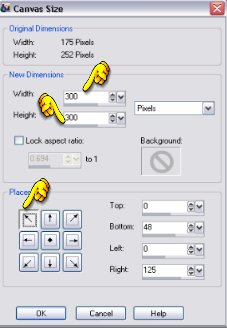
- 4. Make Length and Width 300 pixels and check either "upper right" or "lower left" corner
for placement of your image
- 5. Your canvas should look like this

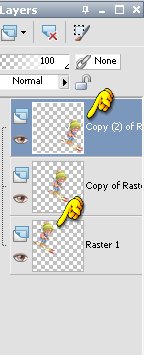
- 6. Go to layer palette and using your mouse highlight the layer and Right click.
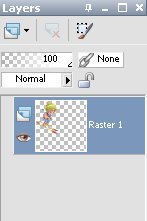
- 7. Then look on the menu and select Duplicate
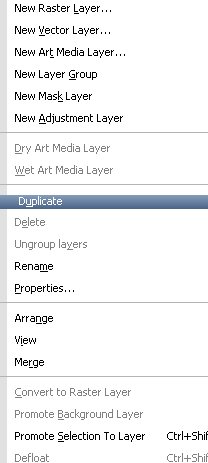
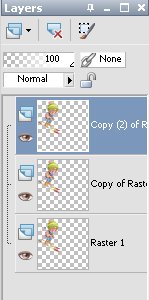
- 8. Repeat duplicating layer one more time. You should have a total of 3 identical layers
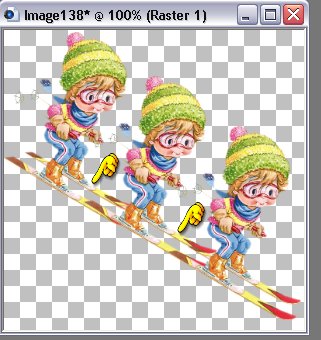
- 9. Now, select your "Mover" tool

- 10. You want to move your skiiers so their skis line up with the one in front of them.
Here is what the image should
look like:
- 11. If needed, move your top layer to the bottom and bottom layer to top. This is the order they should be in because you want the top skiier on the bottom of the layer palette when you save it for animation shop:
- 12. Highlight top layer and select your Text Tool and font, size, create as a Vector

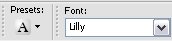
- 13. Select the color you want for your text. This tag used #698c3e
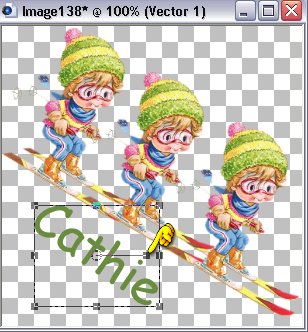
- 14. Apply your text and using your mouse find the little curve arrows to rotate your text so it aligns with the skiiers - the yellow finger points to where it will be. You can also use the mover arrow in the middle of the vector box to move the text around to where you want it. It should look like this
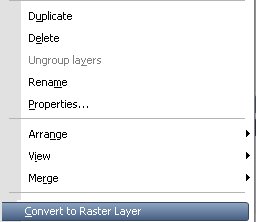
- 15. When satisfied with placement and size of your text go to the layer palette and right click on the vector layer and convert to Raster Layer.
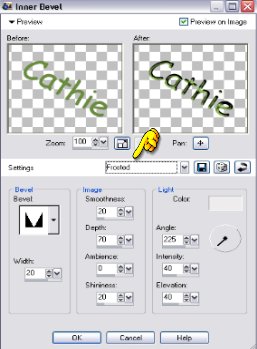
- 16. Go to Effects/Inner Bevel and select the bevel you want to use. This tag used "Frosted" and the auto settings that came with it:
- 17. Return to the layer palette and highlight the text layer. Right click and duplicate. Do this twice:
- 18. You should now have three (3) layers of text
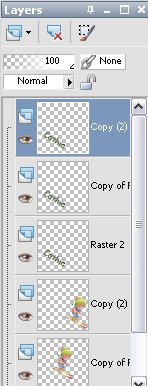
- 18. Turn off ALL layers. Then Turn ON top layer text and top layer skiier:
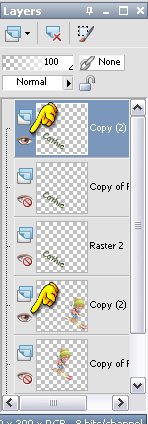
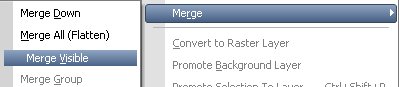
- 19. Highlight top layer and with mouse RIGHT Click and Merge Visible:
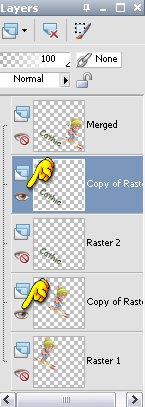
- 20. Turn off MERGED layer. Then select next text layer and Turn ON. Do the same for the next top layer skiier:
- 21. With mouse RIGHT Click and Merge Visible just as you did before:
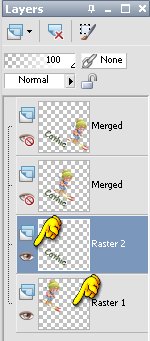
- 22. Again, Turn off MERGED layer. Then select next text layer and Turn ON. Do the same for the next top layer skiier:
- 23. With mouse RIGHT Click and Merge Visible just as you did before:
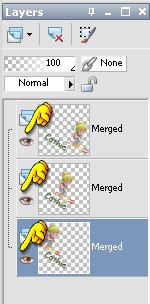
- 24. Turn on ALL three (3) layers then save as a psp image to open in animation shop.
~~~~~~~~~~~~~~~~
Part 2 - Animation Shop
~~~~~~~~~~~~~~~~
Tutorials Index
This tutorial was written by
Cathie for PSP Times Three.
Any similarities to other tutorials is merely a coincidence.
©
PSP Times Three
~January 2007~