Animated Blinking Eyes

This tutorial will show you how to create a
animation with blinking eyes using the push tool in your PSP program.
Preparations:
1. Use this pointing finger - to mark your place. Just drag it along as you read each line.

2. Open your PSP.
3. Go to the bottom of your Windows desktop. Look at your taskbar which is located to the right of your Start button. It lists all the windows folders and programs you have open. Look for an empty spot. Right Click and hold mouse down on that blank space.
4. A menu pops up. Select "Tile Windows Vertically". You should now have the tutorial and your own PSP open side by side. This will aid you in following the tutorial.
5. Supplies Used: Paint Shop Pro, Animation Shop, 1 tube.
6. Download the star tube
HERE or use your own.
Let's Begin:
- 1. Open your PSP program.
- 2. Open the tube, highlight the bottom layer, copy and paste as new image. Close the original.
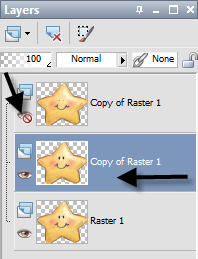
- 3. Go to your Layer Palette and duplicate the image twice so you have 3 layers:

- 4. Go to your Tool Bar and select your "Push Tool":
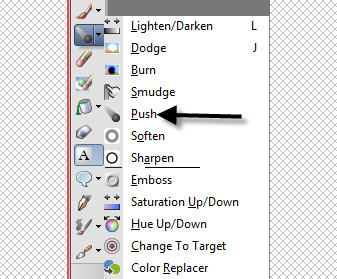
- 5. Adjust the push tool settings; round, size 20, hardness 50, Density & Thickness 100:

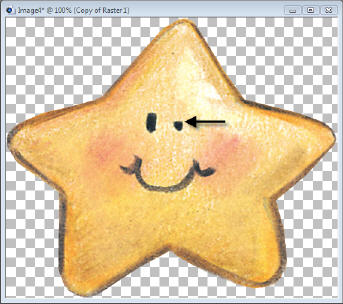
- 6. Highlight your top layer and using your push tool start above the eye and drag the tool
down until the eye looks completely closed leaving a tiny black underline at bottom:
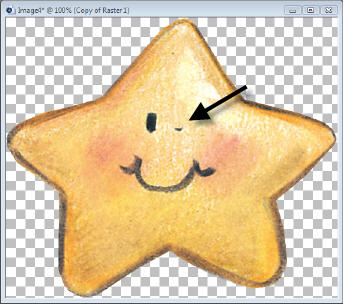
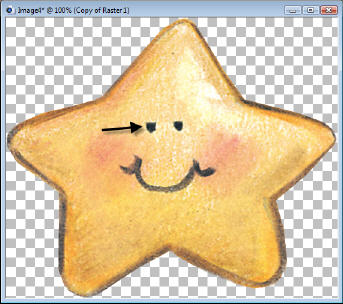
- 7. Repeat the push tool for the other eye until both eyes look closed:
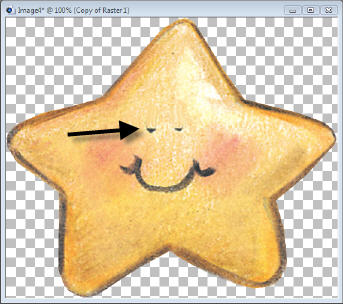
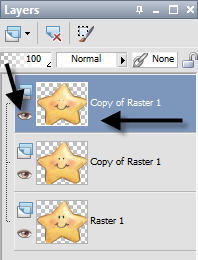
- 8. Close out top layer and highlight the next one:
- 9. Using your push brush close the eye only half way this time:
- 10. Again, repeat the push brush on the other eye closing it half way:
- 11. Open and Highlight your top layer again:
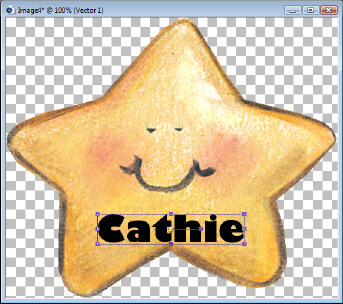
- 12. Select your text tool using Vector Mode, font, size, color:

- 13. Apply your text and adjust to your liking:
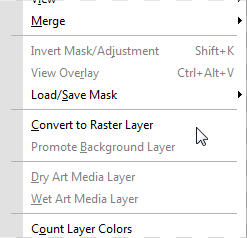
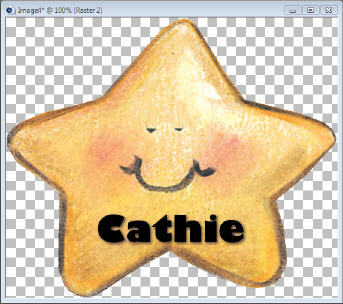
- 14. Go to Layers/Convert to Raster Layer:
- 15. Add your drop shadow, bevel, etc.
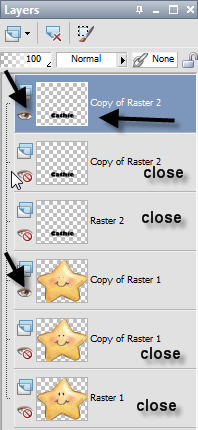
- 16. Duplicate text layer 2 times so you have 3 layers of text and 3 layers of star:
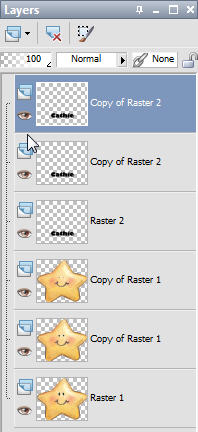
- 17. Highlight top layer and close out 2 other text layers. Leave top star layer open
and close out bottom 2 star layers:
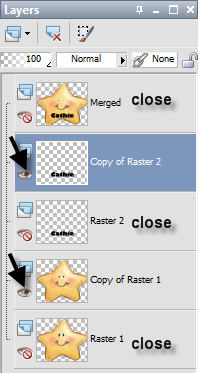
- 18. Go to Layers/Merge/Merge Visable. Then close out top layer, highlight 2nd layer and
open it, then open the top star layer:
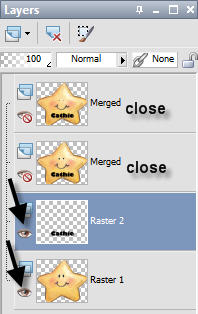
- 19. Layers/Merge/Merge Visable. Then close merged layer. Highlight and open the last
text layer, then open the bottom star layer:
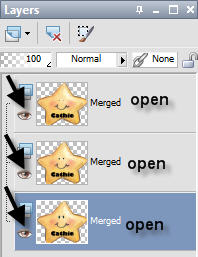
- 20. Last time, go to Layers/Merge/Merge Visable. Then open all closed layers.:
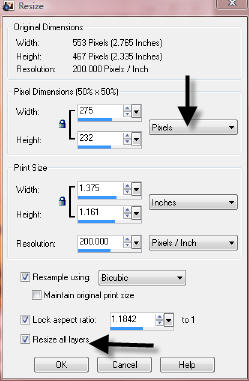
- 21. Go to Image/Resize and adjust the pixel size to what you want your tag size to be. This
one was made Width 275 and locked ration made the Height 232. Be sure Resize ALL Layers is checked:
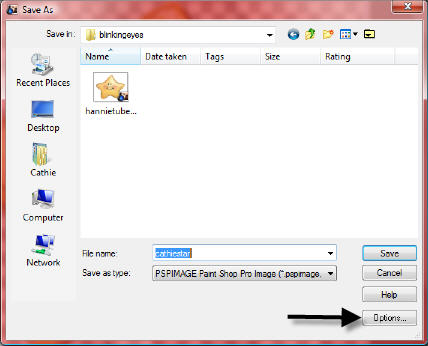
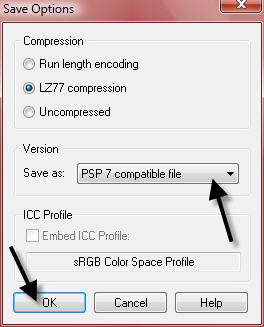
- 22. Save as a psp image. Be sure to check your options on the save box and make it at
least psp7 compatible:
- 23. Open your saved psp image in animation shop. :
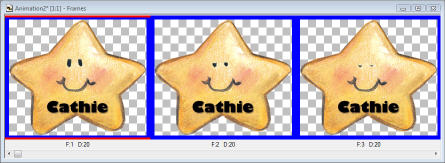
- 24. Go to Edit/Select All and then to Animation/Frame Properties and adjust your display time to 20:

- 25. You can preview your animation by going to View/Animation or clicking the animation icon. If you think
the eyes are blinking too fast or slow return to Animation/Frame Properties to change the settings, then
view again:

- 26. Time to save your animation. You can always use the optimization wizard to get a better output result.
You will find that under File/Optimization Wizard. But, if you click File/Save As it will
compress and save nicely. I do not recommend using the plain "Save" feature.
You did it! Please be sure to share your results with everyone. You can try this using various tubes
that offer good eyes to work with. Hope you had fun!
~~~~~~~~~~~~~~~~
Tutorials Index
~~~~~~~~~~~~~~~~
This tutorial was written by
Cathie for PSP Times Three.
Any similarities to other tutorials is merely a coincidence.
©
PSP Times Three
~May 2007~