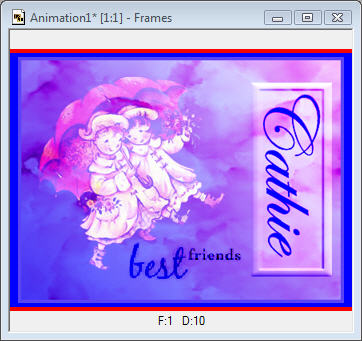
Best Friends Rainy Day Tag

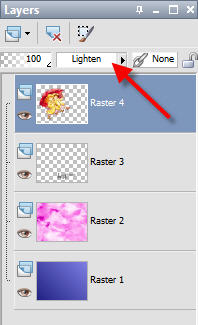
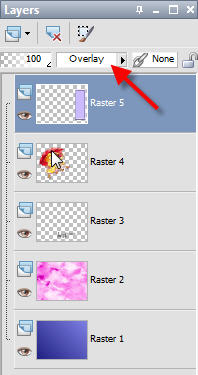
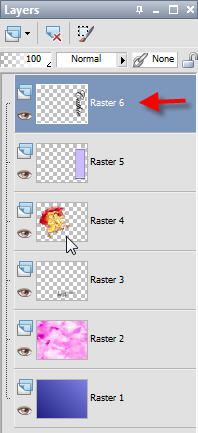
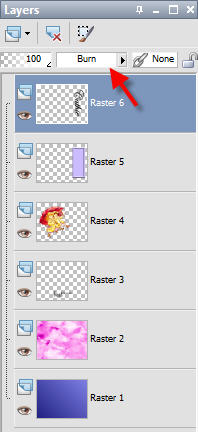
This is the tube Blend Mode used in the tut                This is an optional Blend Mode for the tube


This tutorial will show you how to create an animated tag that looks like rain falling and familiarize you with Blend Modes.

NOTE: You will need Eye Candy 4000 to complete this tut. You can download a 30 day free trial HERE

Preparations:
1. Use this pointing finger - to mark your place. Just drag it along as you read each line.

2. Open your PSP.

3. Go to the bottom of your Windows desktop. Look at your taskbar which is located to the right of your Start button. It lists all the windows folders and programs you have open. Look for an empty spot. Right Click and hold mouse down on that blank space.

4. A menu pops up. Select "Tile Windows Vertically". You should now have the tutorial and your own PSP open side by side. This will aid you in following the tutorial.

5. Supplies Used: Paint Shop Pro, Eye Candy 4000, 1 tube, 1 gradient, 1 brush, and 1 pattern.

6. Download the supplies (gradient, tube, brush, and pattern) HERE: Place the gradient in your gradients folder and the brush in your brush folder.


Let's Begin:

  • 1. Open your PSP program. Open your tube and background pattern (pink marble).

  • 2. Copy your tube and paste as new image. Close the original. Resize the copied tube by 50% and set aside.

  • 3. Create a new transparent image 400 x 300:


  • 4. Select your flood fill tool and your blue gradient. Flood fill your transparent image:


  • 5. Create a new layer. Selections/Select All. Go to your pink marble pattern (called background) and copy that. Then Edit/Paste into Selection.
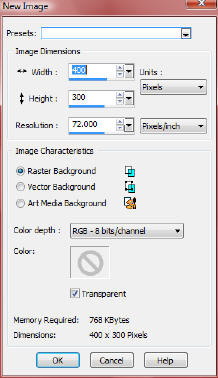
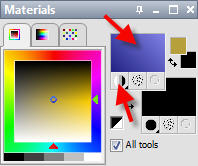
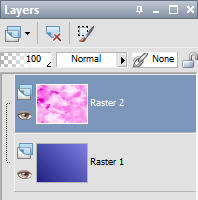
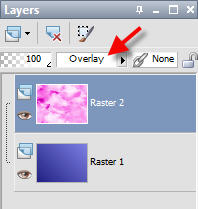
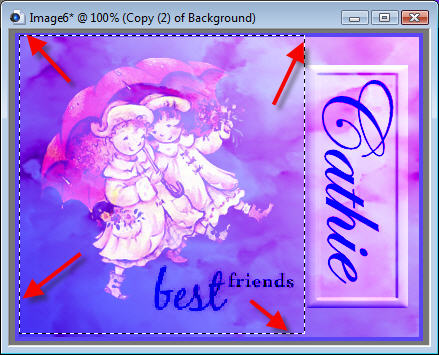
    Go to Selections/Select None. You should have 2 layers, 1 blue and 1 pink marble:


  • 6. Highlight the pink marble pattern layer. Change the Blend Mode from Normal to "Overlay";


  • 7. Change your Materials Palette to Black Paint:


  • 8. Create a new layer and select your paintbrush tool. Look for the "Best Friends" brush and use these settings:
    Size= 150, Step= 25, Density= 100, Rotation= 0, Opacity= 100


  • 9. Place the brush on your new transparent layer near bottom center. You can move this later.


  • 10. Adjust the Blend Mode to "Burn":


  • 11. Now, go to your reduced tube and copy that. Go to Edit/Paste as New Layer and line it up near left side but centered:


  • 12. Change your Blend Mode to "Lighten" - If you prefer you can also use "Luminance (Legacy)" - see variation results at the top and bottom of this tut:


  • 13. Create a new raster layer. Select your rectangle tool and draw a rectangle on the right side of the image near the side edge but not too close. You can adjust this later. Flood fill with color #cbbbfe (blue):


  • 14. Go to Effects/3D Effects/Inner Bevel and use these settings:
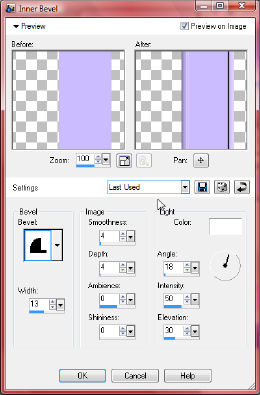
    Select Bevel 11, Width 13, Smoothness 4, Depth 4, Ambience & Shininess 0, Angle 18, Intensity 50, Elevation 30


  • 15. Change Blend Mode from Normal to "Overlay":


  • 16. Change your Materials Palette back to Black Paint:


  • 17. Select your text tool, font, size, and using "Vector Mode" add your name. Turn the text so it fits into your blue framed rectangle:


  • 18. Convert Vector to Raster Layer:


  • 19. Change Blend Mode from Normal to "Burn":


  • 20. Highlight your Rectangle Box Layer and use your "Pick Tool" to adjust the size of your rectangle box so that your name fits properly:


  • 21. Use your "Move Tool" to place the Brush, Text and Text Frame the way you want it:


  • 22. Merge Visable. Go to Image/Add Borders and use color #5a44f4 add a 4 pixel border:


  • 23. Duplicate your merged layer 2 times so you have 3 layers:


  • 24. Using your Rectangle Tool select a region outside your Text Frame but over your tube and brush:


  • 25. Go to Effects/Plugins/Eye Candy 4000/HSB Noise and use these settings:
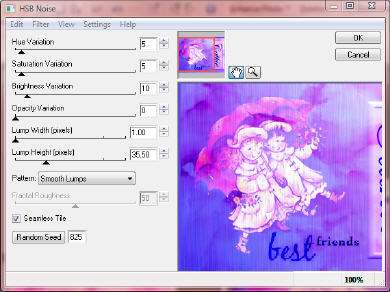
    Hue 5, Saturation 5, Brightness 10, Opacity 0, Lump Width 1, Lump Height 35.50, Pattern Smooth Lumps, Seamless Tile, Random Seed 825 - DO NOT DESELECT


  • 26. Go to your Layer Palette and close off top layer and highlight second layer.


  • 27. Go to Effects/Plugins/Eye Candy 4000/HSB Noise and use these settings:
    Hue 2, Saturation 2, Brightness 10, Opacity 0, Lump Width 1, Lump Height 35.50, Pattern Smooth Lumps, Seamless Tile, Random Seed 430 - Selections/Select None


  • 28. Optional - you can now resize your image if you like. I've resized mine by 80%:


  • 29. Open your Animation Shop. Return to your PSP and Highlight the BOTTOM layer, copy it and paste it as a new animation in Animation Shop:


  • 30. Return to PSP and Highlight the TOP Layer, copy it and go to Animation Shop. Click Edit/Paste/Paste After Current Frame


  • 31. While in Animation Shop Highlight the first frame. Go to Edit/Copy:


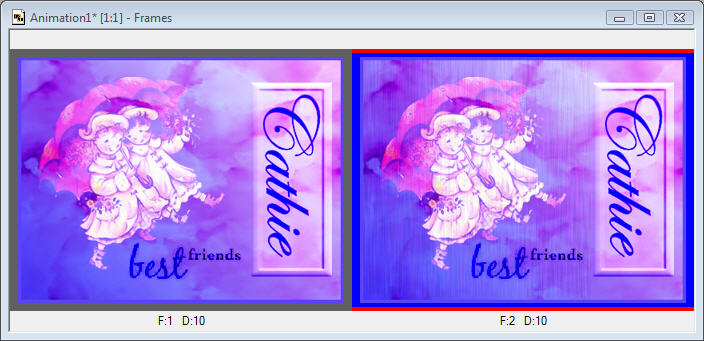
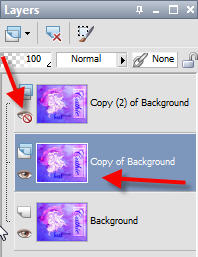
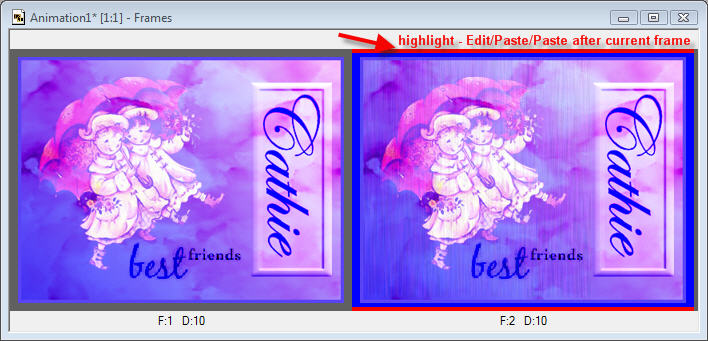
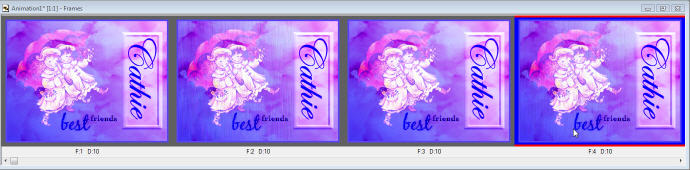
    Then highlight the second frame. Go to Edit/Paste/Paste After Current Frame:
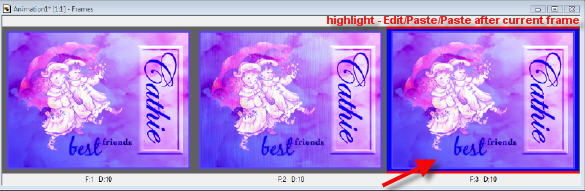

  • 32. Return to PSP and highlight your MIDDLE Layer. Copy that and bring it to Animation Shop.
    Highlight the third frame and go to Edit/Paste/Paste After Current Frame:


  • 33. You should now have 4 frames. Go to View/Animation and watch the rain. Go to File/Save As and give your animation a name:


  • 34. This is a resized version of the tag:


  • 35. You can also give your tube a completely different look by changing the "Lighten" mode to "Luminance (Legacy)"


Please be sure to share your results with everyone. Use your imagination - Try using the different Blend Modes and see what you come up with. You can even use different brushes. Hope you had fun!

~~~~~~~~~~~~~~~~

Tutorials Index

~~~~~~~~~~~~~~~~


This tutorial was written by Cathie for PSP Times Three.
Any similarities to other tutorials is merely a coincidence.
©   PSP Times Three
~May 2007~