Let's do our first pixel graphic! We'll start with this little flower *Ü*
Use these settings for your Paint Brush: 
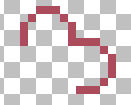
Choose a pastel colour (I don't like to give you the colours... The idea is to make your own flower, and to follow your good taste!). We¿ll draw the outline and the inner lines. All the screen shots are showed at 800% zoom. That means you'll have TWO pixel on each square (white or gray). Draw the first petal like this:

Add a second one...
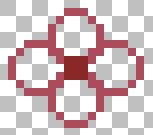
Then, to avoid work... :O9 duplicate your layer and go to Image/Flip, and then Image/Mirror. Drag the second layer to get this outline, and merge.

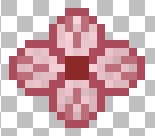
Add some inner lines with the outline colour, to make the petals. After that, choose a darker colour (or a different one; it could be yellow or brown) and draw a 3 pixels square to make the centre.
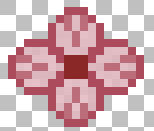
With your Magic Wand, select the petals, and fill with a lighter colour. To give it a soft shadow, add a little noise to it (use Monochrome, Uniform. I've added 5, but you can play with the amount of noise). Do not add too much; we are going to apply our Lighten/Darken brush later. Deselect. Choose an intermediate colour and draw the inner lines. They'll give it depth.
Let's use now the Lighten/Darken brush. I think this is our best "weapon" to reach the right shadow in pixel painting. You have the Darken brush in the right button of the mouse, and the Lighten in the left. A few words about the settings: we are using a huge size of brush, if you compare it with the graphic's size. You have to click the graphic slightly and always "out of it" when you work with Darken. You will cover part of the canvas. That gives to your graphic an evanescent dark border inside the outline. That's why we must select the area first. The Lighten brush must be applied inside the graphic (without deselecting, of course). Right click a few times and then apply the Lighten. See if the graphic is too dark or to light, and choose one or another. Do not apply too much!. We'll see in another tutorial more about shadowing :o)
Select the petals again with your Magic Wand (hold Shift to select some sections at the same time), and brush with these settings: You can adjust the size or the settings as you like. Play with them!
Darken: 
Lighten: 
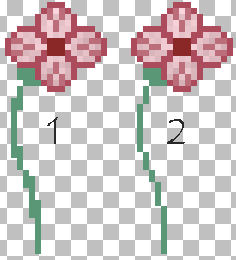
Deselect... Your flower is done! You can save is as a gift and also tube it to use whenever you want.
 Real size:
Add a new layer. With your Paint Brush again, and a pastel green colour, draw the base of the flower, and a free line to make the tail. Take the Eraser Tool, size 1, and take off all the adjacent pixels. You must clean up them, because they will give to your tail a "dirty" look in small size. (You must remember this!). Take a look:
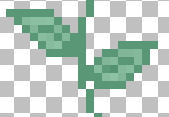
Let's add the leaves. Add a new layer, and draw them using the tail colour. Fill with a lighten green. Do them by yourself; I'm only showing mines here!!! Select the leaves and add the same noise; that will be enough to shadow them. Merge the visible layers, copy, paste as new image, and save as transparent gif, as I told you in the other tutorial *Ü*
Now... fun begins! Change colours, combine them, link the flowers with vines, make frames... In a word...GO, GIRL!