
Sweetheart Tutorial
by Leeanne - PSPX3 Manager
This tutorial is dedicated to my good friend Cathie
for all her help, support and encouragement.
Written in psp9 for those who have a good
knowledge of PSP.
Any similarity with any other tutorial is purely coincidental
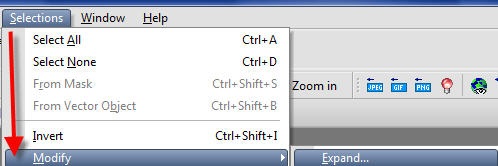
Filters needed -
Eye candy 4000/gradient glow
You can download trial of Eye Candy
HERE
Tube of choice -
I used the artwork of ©Jennifer Janesko
Available for purchase from
CILM
Font of choice
Lottie's Scrapkit is included with supplies.
You can check for other great kits at
Lottie's Place
If any of the included supplies have been created by you
Please let me know so I can give full acknowledgement
Download the supplies
HERE
~~~~~~~~~~~~~~~~~~~~~~~~~~~~~~~~~~~~~~~~~~~~~~~~~~~~~~~~~~~~~~~~~~~~
- 1.
Unzip and open all supplies in PSP.
Choose your tube, open it and
minimize all
- 2. Open new image 600 x 500
and
Flood fill with white
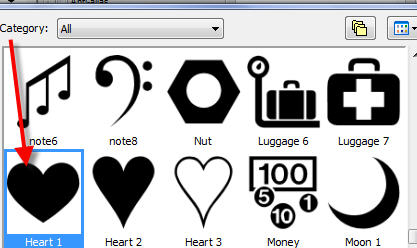
- 3. Go to preset shapes
Choose a heart of choice
I used heart 1
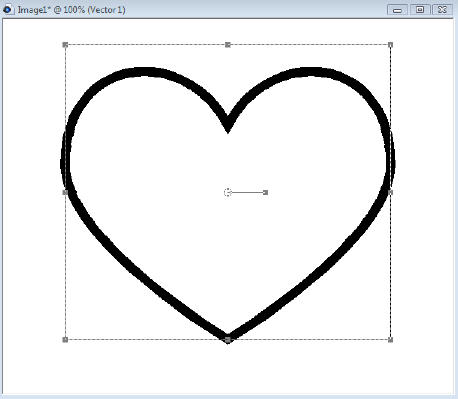
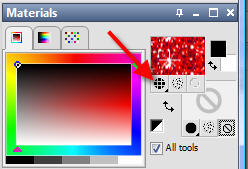
- Go to your colour palette
Foreground black
Background x out
Line style solid
Width 12
Miter limit 10 anti alias checked
Create as vector checked

- Hold shift key down (this makes a better proportioned shape)
Draw the heart to desired size
Go to objects/align/center in canvas

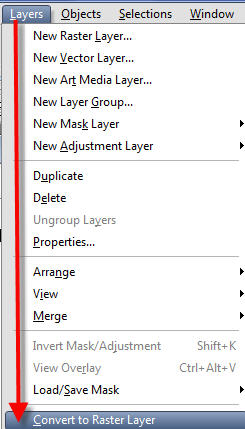
- Convert to raster
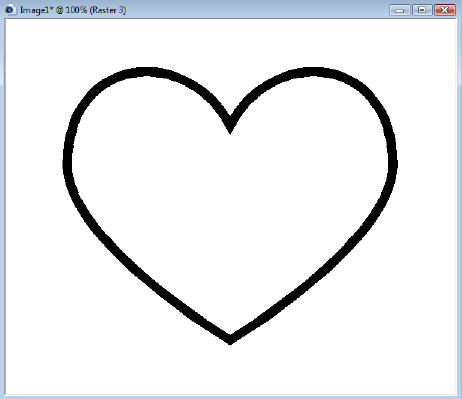
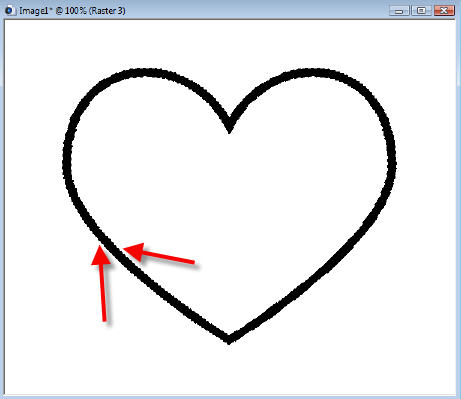
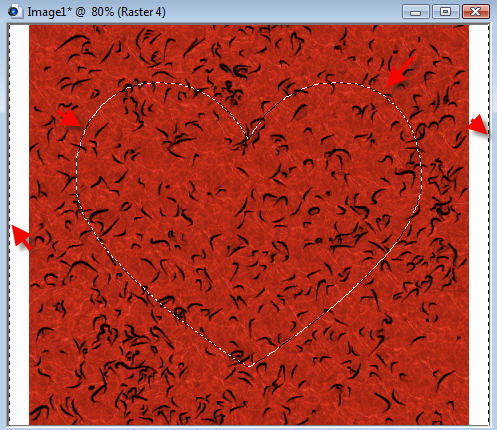
- 4. On this heart layer Click magic wand
Replace/ RGB value/ Tolerance 20/ contigious ticked/ Feather 0/ anti alias unchecked

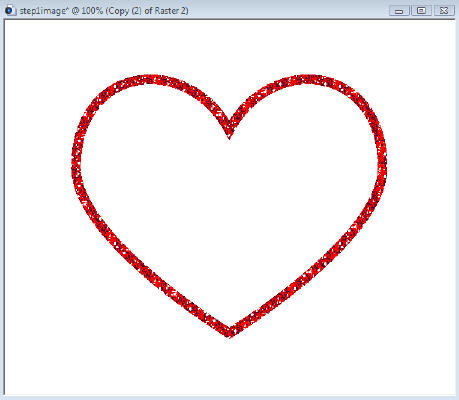
- Click on the black outline of your heart. You will now see the marching ants:
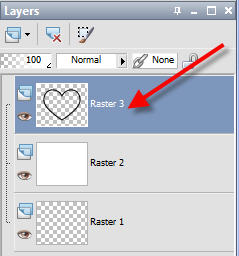
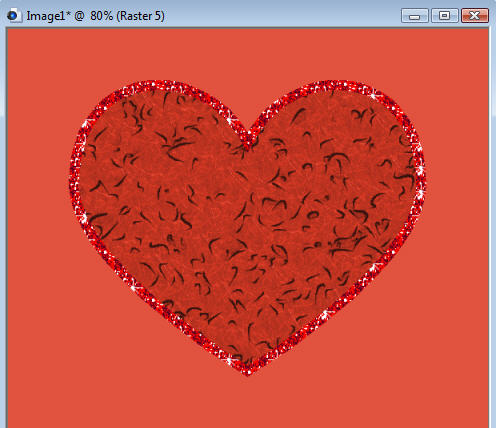
- 5. Duplicate heart x 2 - You Now have 3 hearts
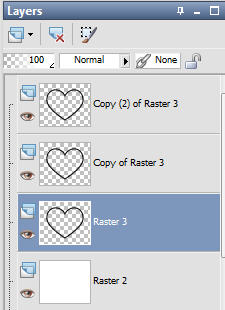
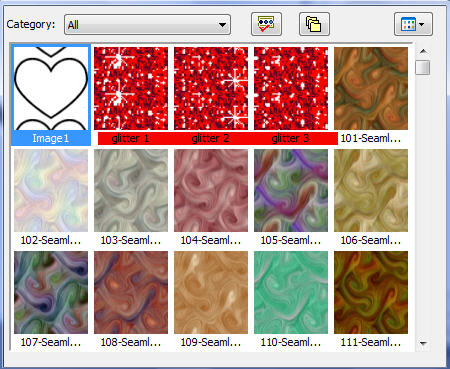
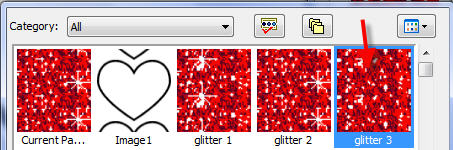
- 6. Open the 3 red glitters from your supplies. Go to your colour palette and select Patterns -
You will notice in your patterns the 3 glitters
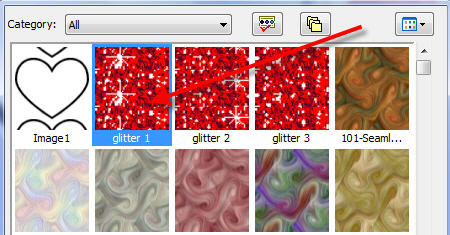
- Select glitter 1 - ok and
go to original heart layer. Flood fill with glitter
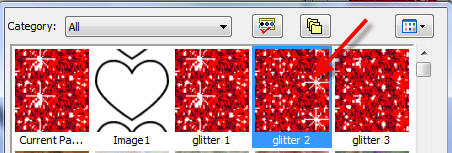
- Now back to colour palette - Pattern/ find glitter 2 -
Go to 2nd heart Flood fill with glitter
- Back to colour palette -
Pattern/ find glitter 3 -
Go to 3rd heart and
Flood fill with glitter - Select None
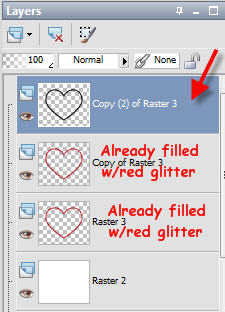
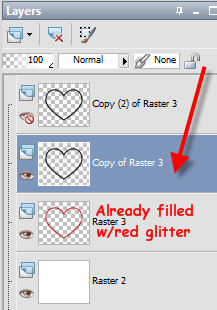
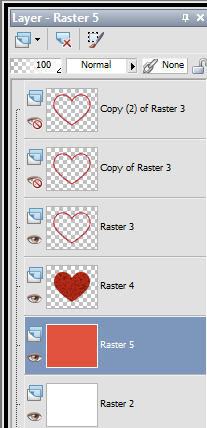
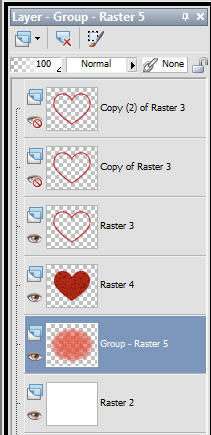
- 7. You now should have:
White raster layer (bottom layer)
Heart layer
Heart layer duplicate
Heart layer duplicate 2
You may rename these layers if it helps you
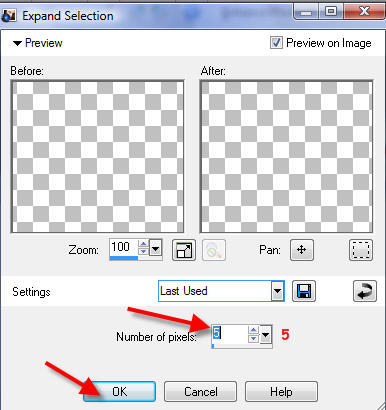
- 8. Go to the original heart layer
- Magic wand (same settings)
Click inside the heart
Selections/Modify/Expand by 5
- Open the scrapkit. Using paper of choice from the scrap kit provided,
highlight the layer - then go to Edit/Copy
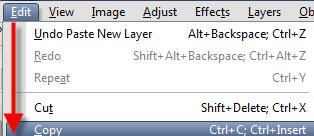
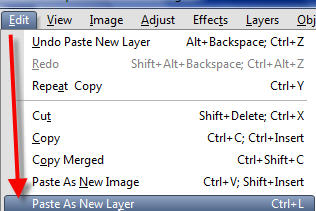
- Then Edit/Paste as new layer
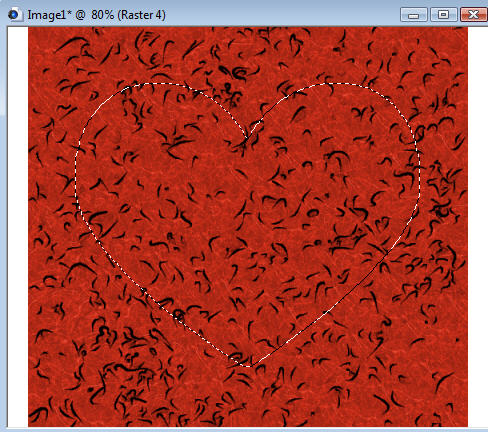
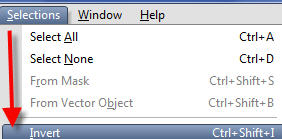
- Selections/invert - Then hit your delete key.
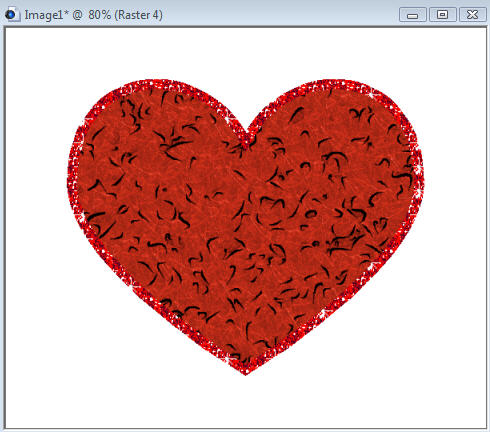
- This is what it should look like:
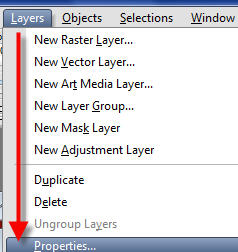
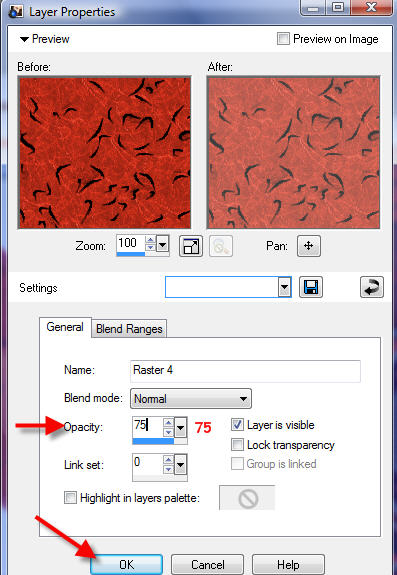
- Move paper layer below the heart. Go to Layers/Properties and Lower to 75 and select none

- 9. Go to white layer and add a new raster layer. Flood fill with colour of choice
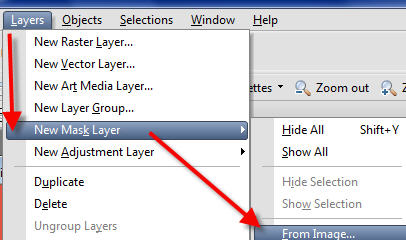
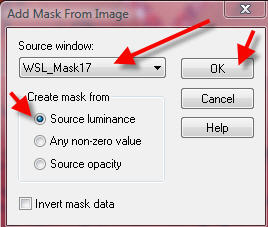
- Open the WSL-Mask 17
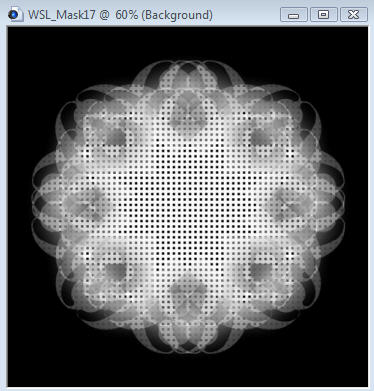
- Go to Layers/ New mask layer/ From image
- Select Mask wsl-17/ invert mask data unchecked
Source/ luminance checked/ ok
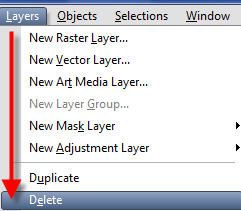
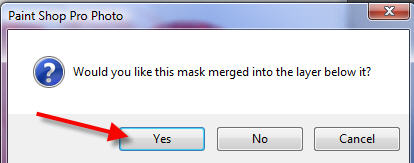
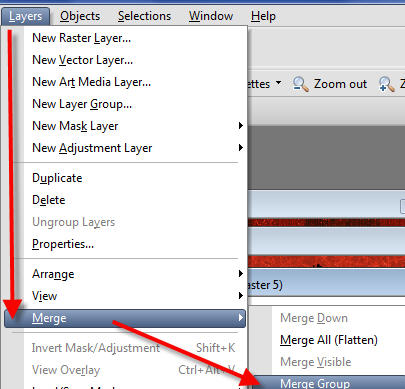
Go to Layers/Delete and delete mask layer/ answer yes - Then merge groups
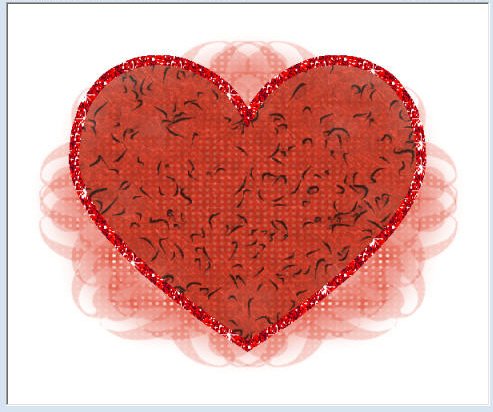
- You tag should resemble this:
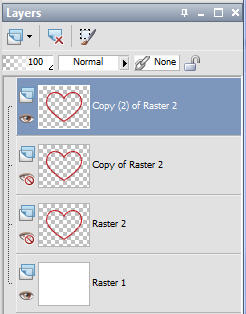
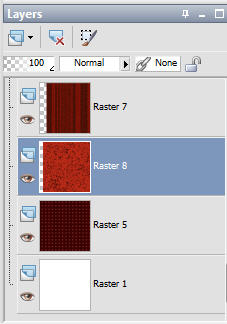
- You will now have
White raster layer (bottom layer)
Mask layer
Paper fill layer
Heart layer
Heart layer duplicate
Heart layer duplicate 2 (image step 2)
Okay now we have more to go so be sure to
remember to save your work often
~~~~~~~~~~~~~~~~
CONTINUE TO PAGE TWO
~~~~~~~~~~~~~~~~
PSPX3 Tutorial Index
~~~~~~~~~~~~~~~~
This tutorial was written by
Leeanne
exclusively for
PSP Times Three
Tube by Artist: © Jennifer Janesko
Any similarities to other tutorials is merely a coincidence.
~All rights reserved - May 2008~