|
How to Create a Tube from a Graphic
This tutorial was written by our member Lori Toth
(These directions below are written for any version of PSP the only change being what the feather setting is ... 1 for psp10 and higher, 0 for psp 9 and below. When we get to the finishing part in next teaching lesson location of finishing touches may change from one psp version to another as well)
BEFORE WE START REMEMBER THIS ONE GUIDELINE ALONG YOUR PATH,
SAVE AND SAVE OFTEN BUT MAKE SURE TO MAKE YOUR INITIAL SAVE USING THE SAVE AS SELECTION IN FILE, AND CHANGE THAT FILE TYPE TO A PSP IMAGE EXTENSION NOT A JPG OR GIF.
failure to change the extension will cause you to have to start over from beginning losing all your hard work along the way. failure to save along the way can also cause you to lose your hard work should psp shut down, system crash, kitty paws or kids fingers on keyboard...all sorts of things can happen. Its happened to most everyone at one time and a situation you learn the hard way to remember if you happen to forget.
Download the graphic I used here
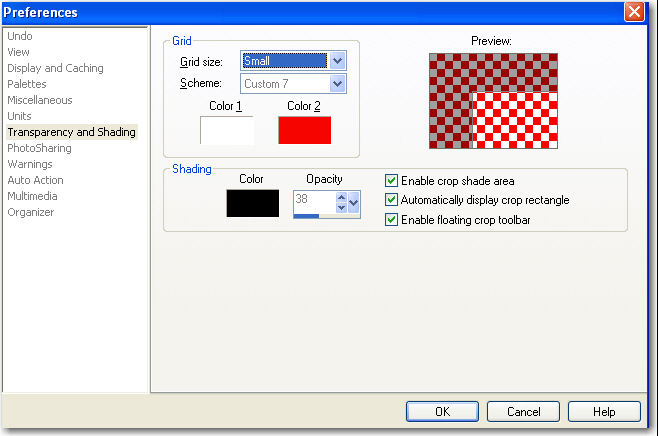
First thing we need to do is reset our transparent layers setting in psp to allow for easier viewing of the edges. Go to FILE ...Preferences...General program preferences and select transparency and shading.... and select SMALL grid size and under scheme select any of the numbers and customize it to bright red and white colors for color 1 and 2. and save/ok. This will keep this color combo as that customized number on dropdown menu unless psp uninstalled and reinstalled again or you default psp back to factory settings. Then can redo this again. It will enable much easier viewing of the transparent pixels as well we will deal with in finishing touches in later email.
Step 1
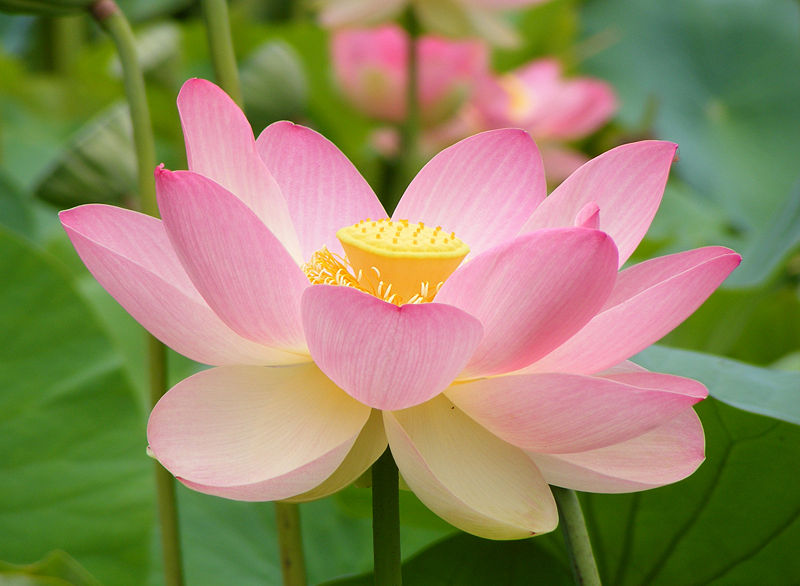
Initial graphic
feel free to use any graphic of your choice, I have chosen this flower because it is one with distinct lines and a clear view of the object for anyone starting out but still be interesting enough to want to complete it hopefully
Step 2
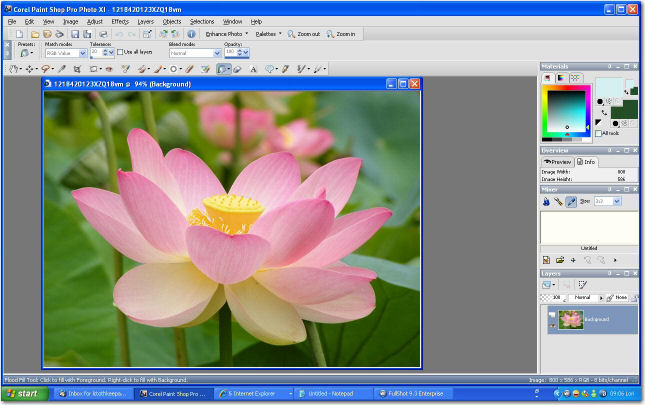
Select your lasso as shown below in screenshot. Make sure to use the freehand selection option here.

Step 3
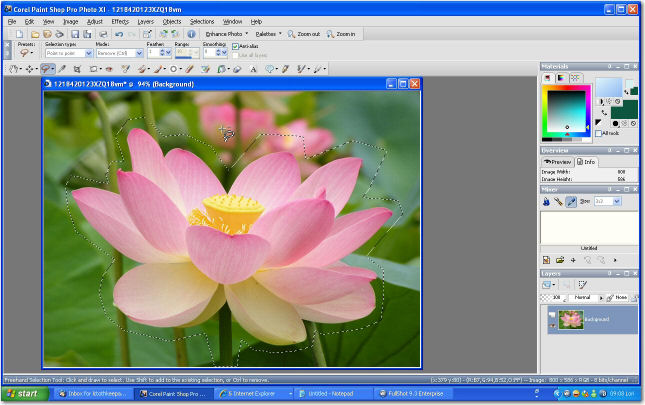
Using your lasso go around the image you wish to tube completely encircling it a short distance from the edges. No need to worry about being exact as long as do not encroach upon the image you wish to tube, as its only a "helper" to get rid of the extra background clutter faster.
Double click when get back to where started to put the "marching ants" all the way around the image in a full "circle".
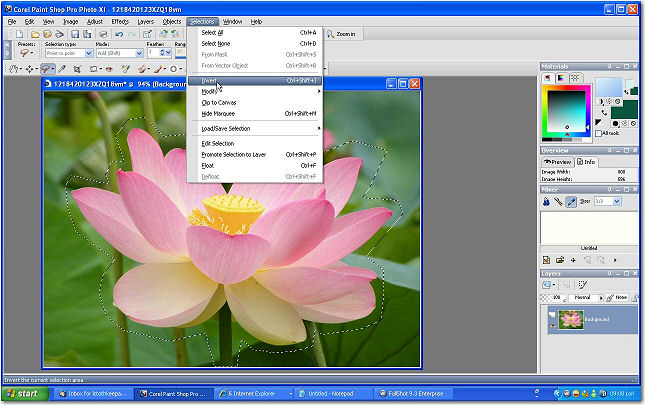
Step 4
Once the image you wish to tube is encircled fully go to selection ....click on INVERT.
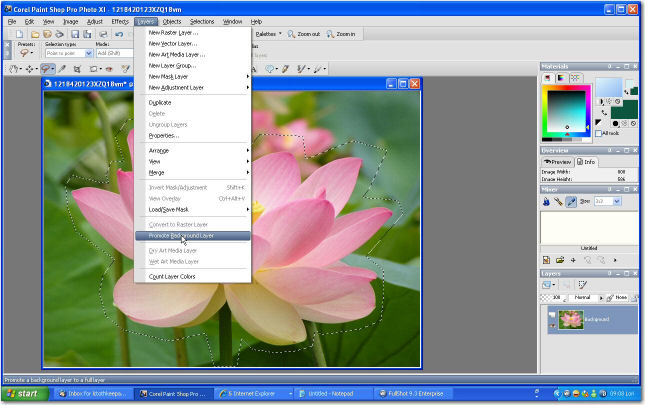
Step 5
Now go to Layers... click on PROMOTE BACKGROUND LAYER as shown below.
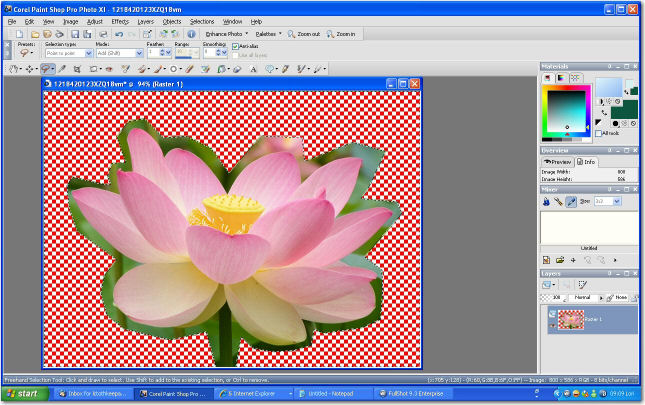
Step 6
Once you have done that hit your delete key ONCE. This will remove all the area outside of your "circled image", clearing the extra background clutter in one step.You are now ready to start the actual tubing of the image.
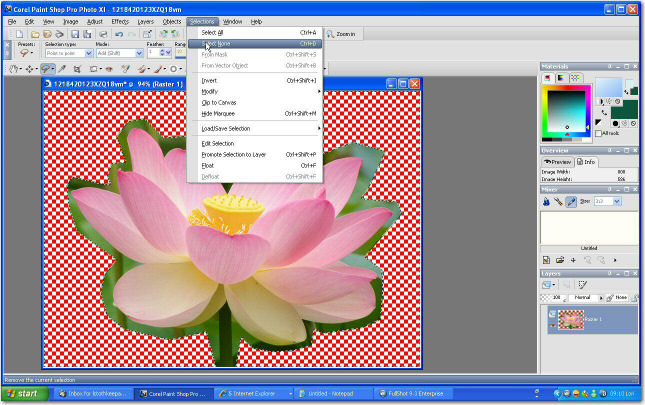
Step 7
Go back to Selections...Select None. This will remove the ants from your view at moment until we start creating more as the tubing process goes along. You will want to do this periodically and will take the ants out of your way when doing delicate, tight areas.
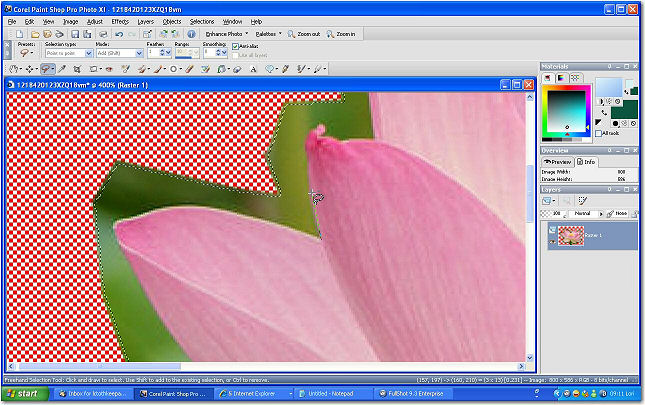
Step 8
Using the Lasso again (freehand selection always for it), draw just INSIDE the edge of the image you are tubing. Have your selection type set as POINT TO POINT and mode as ADD (anti alias is checked). Make sure to have your image expanded to 400 percent as shown here. After you get some experience you will possibly run into some image you wish to tube at a different viewing percentage, I've done some parts at 300 and some at 500 but usually try and stay around 400 for most of the tube. This way you are removing BITS of pixels only not the entire pixel so can go just inside the edge of the image. When taken back to 100% normal view it won't appear you have removed any of the image itself. If you go too far off the outside of the image you leave background behind and this will be apparent later when doing a finishing check for transparents and stray pixels.
Make a complete "line" always coming back to where you started. Go along the image just inside the edge and then off into the background area as shown in next step, coming back to initial start on this area. Double clicking once again when meet the starting spot just as did before.
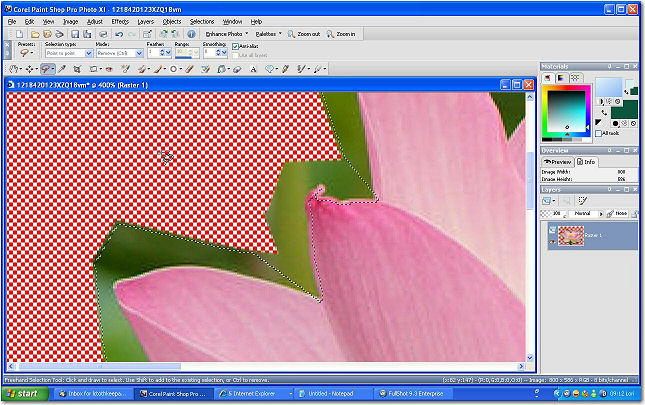
Step 9
Here we have gone along the inside of a petal edge and back to where started, double clicking to allow cursor to be released from the line created. Hit Delete once. (the more times you click on delete the more of the area it will remove taking a bit more off the line edges each time. That is why only once at first)
Step 10
The previously selected area has been deleted and we're ready to move on to another section, repeating the steps above to do so. Before you move on however remember to SAVE (save as if first step otherwise can use save option itself) in file and put the tube in progress where you want it to be saved temporarily. And at this time its a good idea to get used to going to selection ...NONE as well. Removing the previous ants and allowing you to view the tube to be with no extra clutter around the edges. Then let's go on to next area and remove the background from that part. Repeat until done.
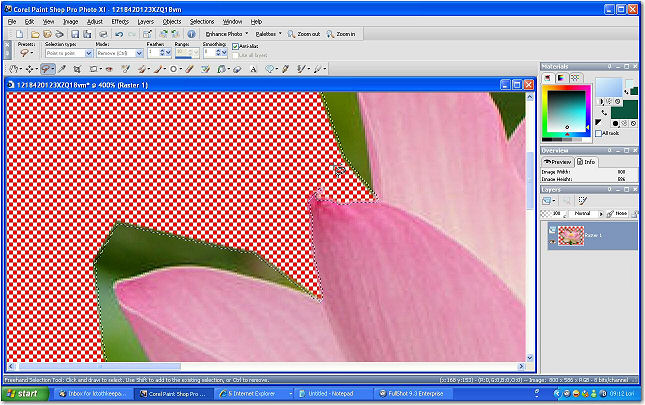
Step 11
This step just shows the next area I've selected for removal, reinforcing the idea that you do it step by step, area by area. If you try and keep going to far at a time before stopping to delete and something slips a bit you will need to redo that same area over again. When you are finished with the entire area do a SAVE AS once again and this time save it with whatever file name you wish to use, my suggestion however is somewhere in the file name put a distinguishing feature showing it is your tube. Personally I use the date as well in file name (month and year) but that is for my own knowledge later on and for others as well to know when it was created...so they can see easily whether its a new one and also I can tell where along the way during my psp tubing experiences I did that tube. I can go back to the first tubes and know when I tubed it showing me how much things are improving as experience increased.
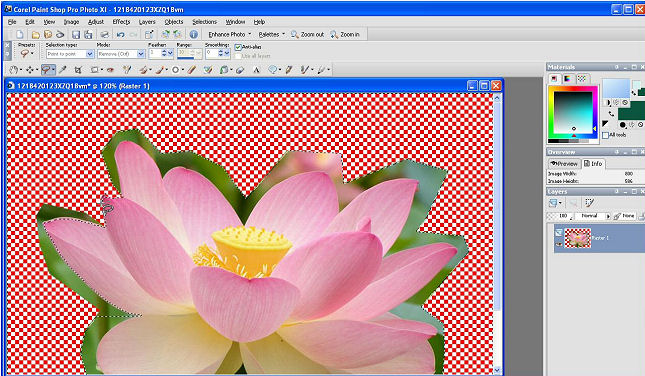
Have Fun Tubing!
This is the most important part of it for sure, because when it ceases to be fun its not something you want to do by choice. We all have images we choose to tube that are frustrating and challenging for their own reasons be it details, fur, hair, unclear edges...but they can still be FUN to tube. I am attaching the final tube both before finishing and after all finalized so you can see what difference the finishing touches make. That information on how to finish is in separate set of directions.
This tutorial was written by me, Lori Toth, based on the instructions given me by my tubing teacher, Lori Rhae. Thanks for making my life fuller, and my psp experiences much more enjoyable and relaxing and FUN. I'm addicted to tubing for sure. If you prefer tagging or creating other psp items, nothing more fulfilling as well as to create that item using a tube you've personally made. A totally unique tube as even when the image has been tubed previously by another tuber, we all put our own finishing touches on that tube so we have a unique tube when done.
Your edit, undo will be your best friend here as well, allowing if there is an oops or you don't like the edge that was created to remove what you have just done and redo it

To do fur, or hair its a matter of adjusting feather, using push tool after tubing around it as much as possible to "fluff" it back up, little adjustments here and there with pen to redraw whiskers,personally I seldom ever outline a tube shadowlab settings in email to follow will put as good or better finishing edge on the tube. and color of edge can be adjusted there as well.
Finishing off the Tube
This tutorial was written by Lori Toth
Any similarities to other tutorials is merely a coincidence.
~All rights reserved - January 2009~
|