|

Add Text to
Animation
Part 2
17. Restore Animation Shop (we had
minimized the program)
18. Go to Edit Paste an new Animation

19. Your text will show as a new image

20. Make sure that all the frames on your
Blue Angel animation are showing. If they are not, click
on the edge and drag.


21. Your animation has 3 frames. See the F:3.
That means that there are 3 frames to this image.
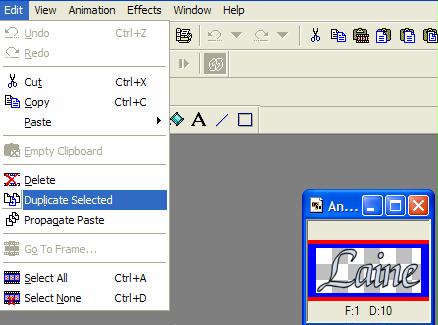
22. Right click on your text image and
choose Edit - Duplicate Selected. Your text needs to be
the same number of frames as your image. So, we
will do duplicate selected twice.

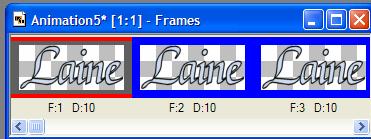
Your text image should now have 3
frames.

23. Make sure all frames of your text
are selected. They will be outlined in blue.
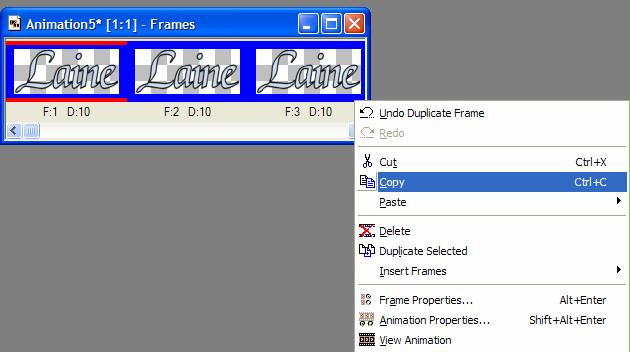
24. Right click and choose Copy

25. . Go to your Blue Angel animation and
click on the blue title bar to make it active.
On your toolbar Edit Select All. This will make all
the frames active.

26. Make sure that you see this blue frame around all the
images

27. Go to your Blue Angel animation and within the image
right click and choose
Paste Into Selection Frame.

MAKE SURE THAT ALL FRAMES ARE HIGHLIGHTED IN BLUE.
28. When the text is placed, you will see an hour glass move
the text to the area you want
it to be placed

29. When you have the area you want, just click and the text
will be placed in all three frames.

30. We need to save our Blue Angel image.
Lets check our properties on our image. Go to Animation
Frame Properties.
Make sure that your frame properties, display time is set
to 30 .
31. File Save As .gif

32. Save in your folder

| Review - I have 3 animated files for you in the download. Open in
Animation Shop and add your name to the image of your choice. Be sure to
send to the group. Download file
here |
Back
Tutorial Index Page
|