|

Seeing Double

Download Supplies
Here
Font BrockScript and FairyElf
Image
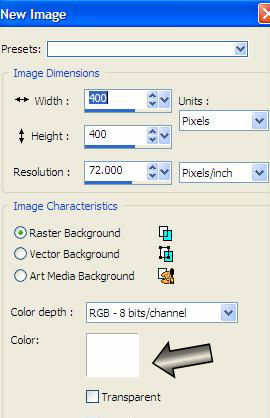
1. Open a new
image in PSP – 400 x 400 with a white background
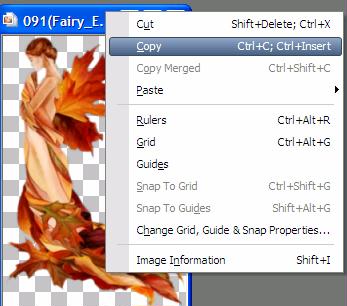
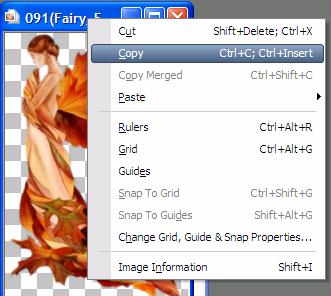
2. Open the
Fairy Elf image. Right click - Copy. Leave
the original open.
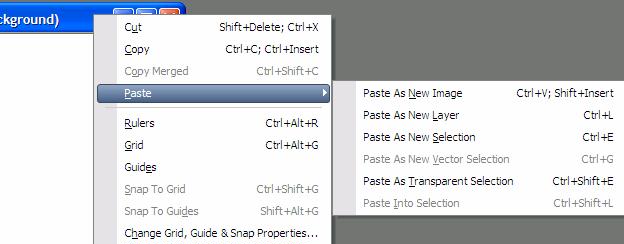
3.
Paste as new image on your white canvas
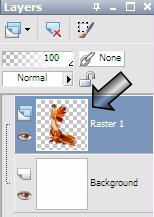
4.
With your Raster 1 selected – make sure that the layer
is highlighted
5. Go
to your toolbar – Adjust – Hue & Saturation – Colorize
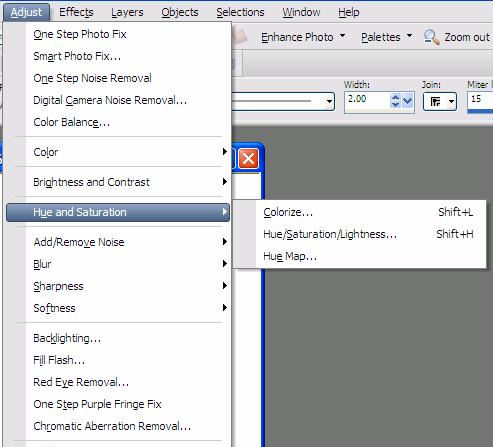
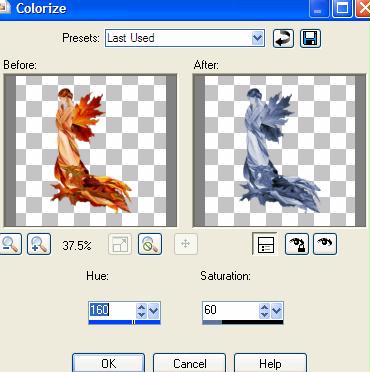
6. Use
these settings
7.
With your Raster 1 still selected – go to Image – Mirror
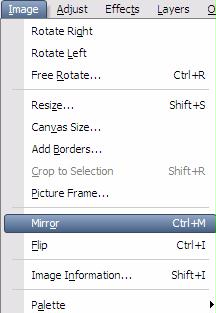
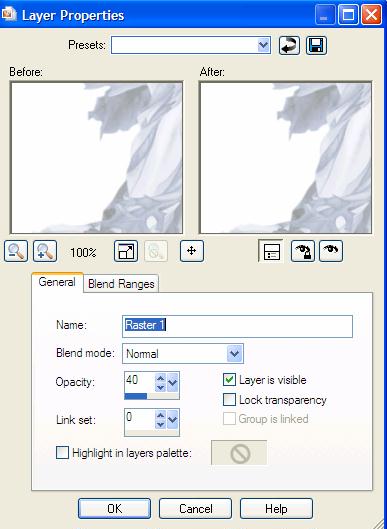
8. Go
to Layers – Properties

9.
Set the opacity to 40
10.
Right click on the original image (FairyElf) that is
open – copy
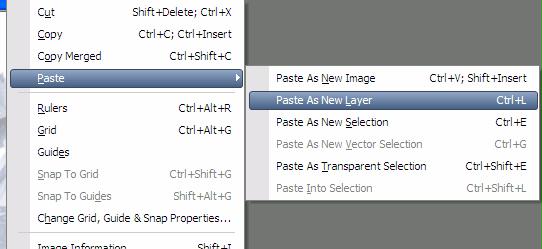
11. You can
close the original image.
12. Go
to your image – right click and paste as new image
13. Your
layer palette should show this
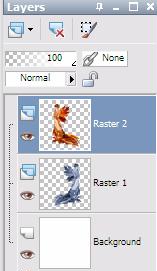
14.
Make sure that raster 2 is highlighted – go to Image –
Mirror
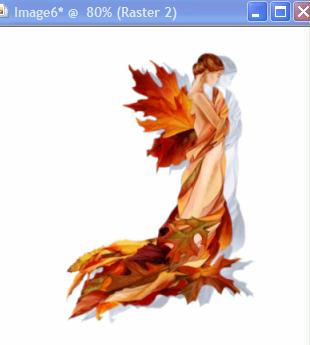
15. With your
mover tool  – Move the raster 2 image to the left and down

16.
Make sure that Raster 2 is still highlighted – go to
Image – Resize and use these settings

MAKE SURE
THAT RESIZE ALL LAYERS IS NOT CHECKED
Tutorial
Page 2
Tutorial Index Page |