
Butterfly Effect Instructions
by Sigrid, Manager of PSPx3
Written in psp9 for those who have a good
knowledge of PSP.
Any similarity with any other tutorial is purely coincidental
This is an instructional tutorial to help you understand how to create
the butterfly wings effect and insert them on a tag using a
basic butterfly pspimage.
You may download the psp butterfly image used in the header tag image
HERE
~~~~~~~~~~~~~~~~~~~~~~~~~~~~~~~~~~~~~~~~~~~~~~~~~~~~~~~~~~~~~~~~~~~~
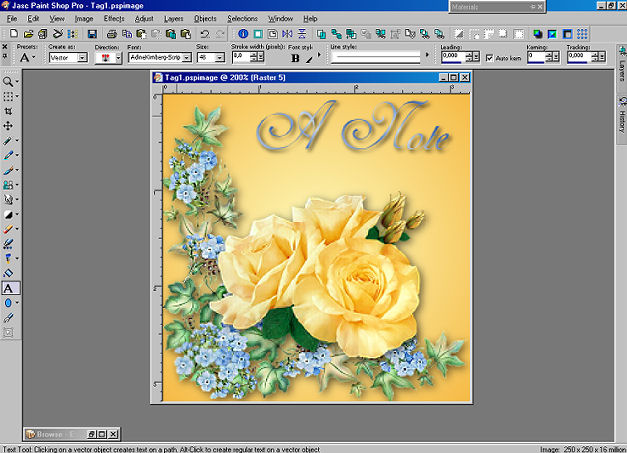
- 1) Create your tag in PSP until you are ready to add the butterfly. See this example:
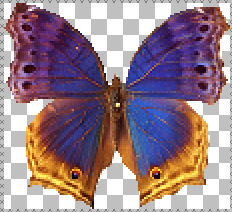
- 2) Choose a Butterfly tube. It must be one that is looking upright or the effect will look weird. Here is what the one provided for you looks like:
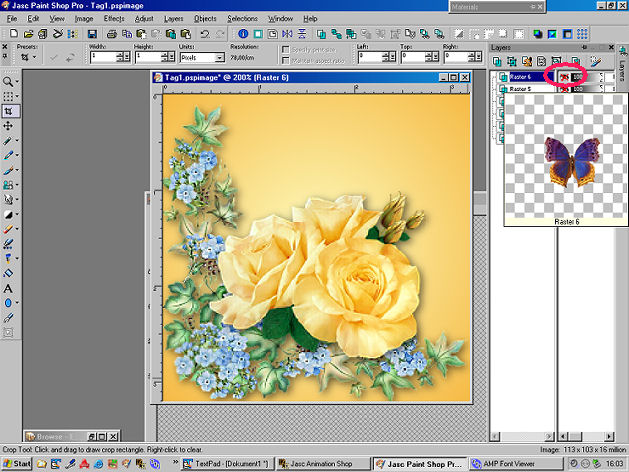
- 3) Copy (Edit/Copy) the butterfly and paste as a new layer (Edit->Paste As New Layer) where you want it to be but don't rotate it. Resize if needed. No drop shadow either. I don't know if the effect would work with a drop shadow added. Your image should look like this:

-
4) In your Layer Palette hide the butterfly:
-
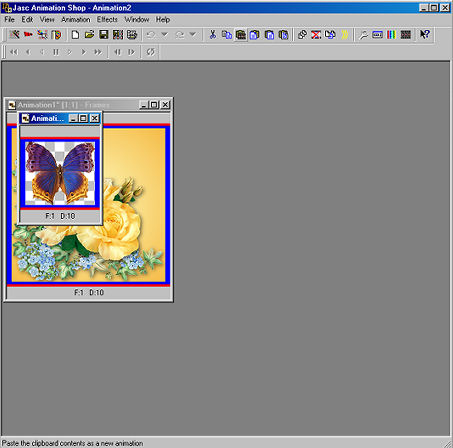
5) Select one of the visible layers and go to Edit->Copy Merged
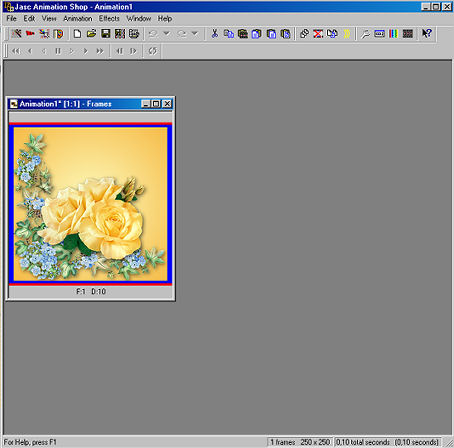
Open Animation Shop (AS) and Edit->Paste As New Animation:
-
6) Return to PSP and Unhide the Butterfly layer and select (highlight) the layer.
Then go to Edit->Copy
Switch to AS again and Edit->Past As New Animation
-
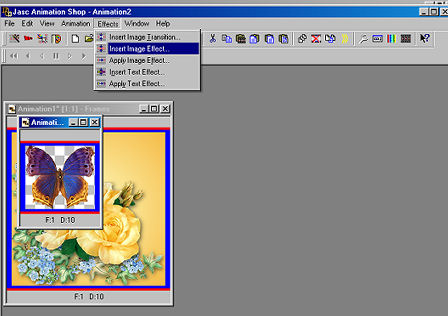
7) In Ani Shop make sure you have the Animation with the Butterfly selected.
Now go to Effects->Insert Image Effect:
-
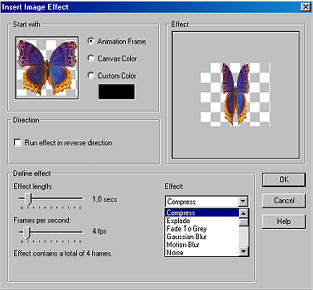
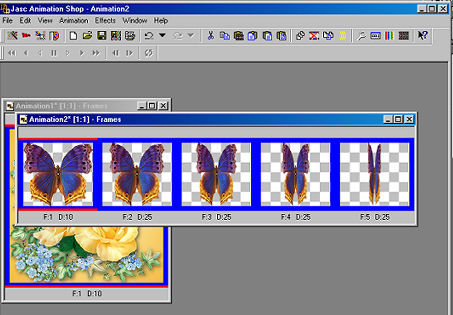
8) Select the Effect Compress out of the drop-down menu. Using these settings:
Effect length = 1.0 - Frames per second = 4 and drop down menu select "compress". Then click OK:
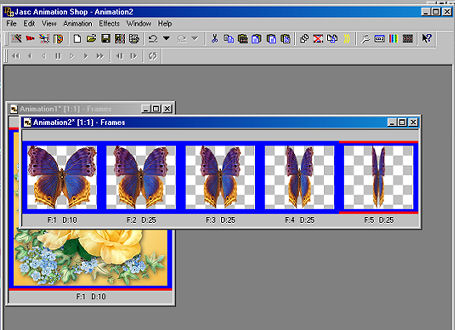
This is what your butterfly image should look like now:
-
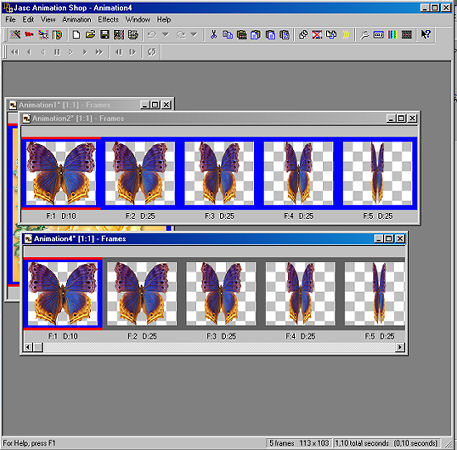
9) Still with your Butterfly Animation selected, go to Edit->Select All (CRTL+A)
Then back to Edit->Copy. And Edit->Paste As New Animation
-
10) Using the new Animation (the one you just copied and pasted) go to Edit->Select All (CRTL+A)
Then go to Animation->Reverse Frames. You now have 2 images with each one going in the opposite direction:
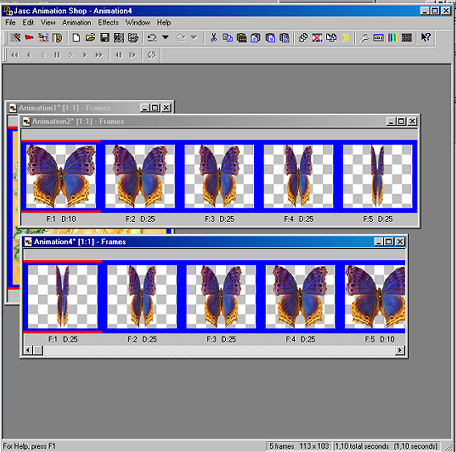
Still on the one you reversed. Keep all frames selected and go to Edit->Copy
Return to the original Butterfly animation and select the last frame by clicking on it.
Go to Edit->Paste After Current:
-
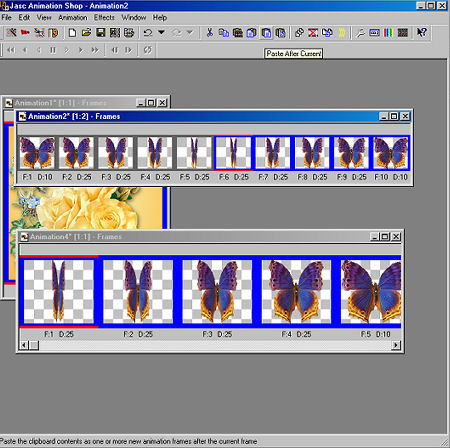
11) Delete the reversed Animation now (that one you copied, pasted, reversed), we don't need it anymore.
If you want, you can save the Butterfly. Then you can use it again and won't have to go through the preparation process again.
The completed butterfly animation has 10 Frames.
Have a look at the animation and see if it is running smoothly. You might want to play with the speed if you are not satisfied.
Time to insert the butterfly onto your tag!
Page Two
~~~~~~~~~~~~~~~~
PSPX3 Tutorial Index
~~~~~~~~~~~~~~~~
This tutorial was written by
Sigrid
exclusively for
PSP Times Three
Any similarities to other tutorials is merely a coincidence.
~All rights reserved - March 2009~