Glitter Tag - Add Text
The following steps will show you how to add a name to the tag:
Part 2
Adding Name:
-
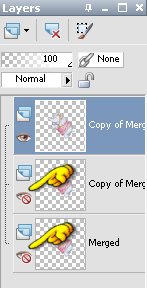
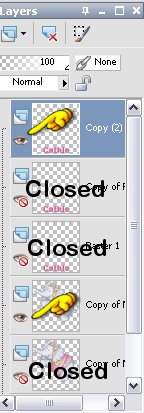
1. Close off the bottom 2 layers and Highlight the top layer
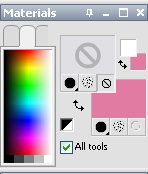
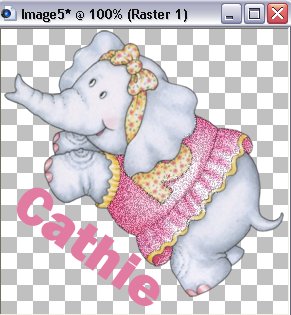
- 2. Choose the color you want for your tag using your eye dropper tool and selecting a color from the graphic image

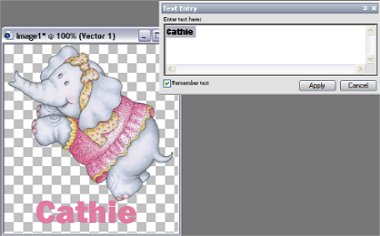
- 3. Select your Add Text tool and choose your font,size, and vector settings

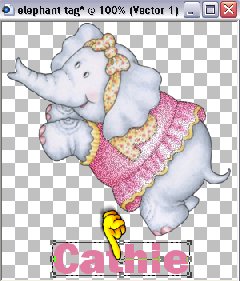
- 4. Add your text and click apply.
- 5. You can move your text to where you want it by placing your mouse over the middle box inside the vector. A + appears that allows you to move it. If you want to angle text place mouse over the box to the right of the middle one. You will see 2 curved arrows. Using mouse, turn to angle text.
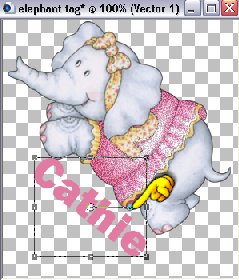
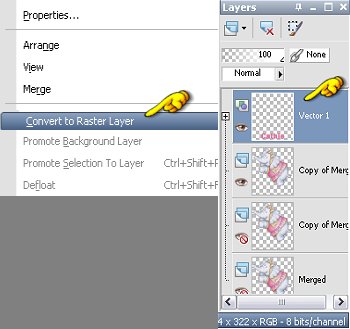
- 6. When satisfied with size and location of text go to the vector layer and Right Click and Convert to Raster Layer.
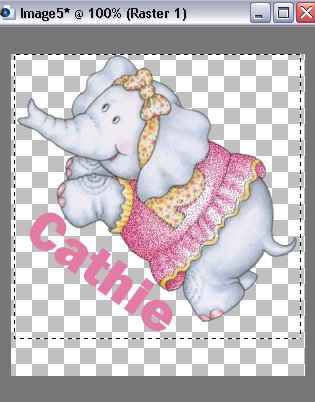
- 7. If you chose to angle text then you will need to use your selection tool again going around the entire image as close as possible without touching the image or text. Then go to Image - Crop to selection.
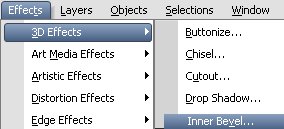
- 8. Time to fix that text. Go to Effects/3D Effects/Innerbevel
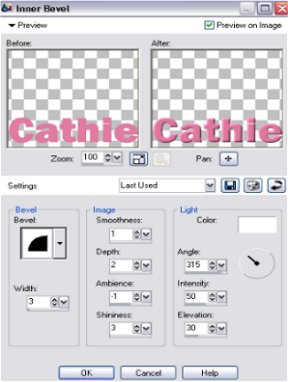
- 9. Use these settings, Width 3, Smoothness 1, Depth 2, Ambience -1 or 0, Shinneness 3 and click Okay
- 10. Now duplicate your text two times so you have a total of 3 layers of text
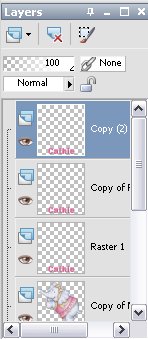
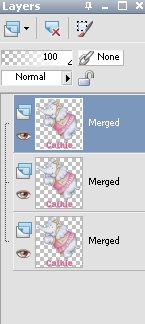
- 11. Close off bottom 2 text layers so you only have 1 text layer and 1 image layer visable
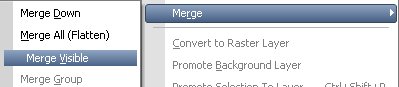
- 12. Merge visable by holding your mouse over the top layer and Right Clicking. Go to Merge/Merge Visable
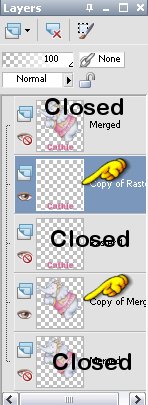
- 13. Close out the top layer you just merged and open the next one below it and also open the first graphic image and repeat merging visable.
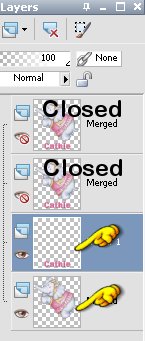
- 14. Again, Close out the second layer you just merged and open the last text and graphic images and repeat merging visable.
- 15. Now open all layers and highlight the top one.
- 16. Go to File/Save As. A box pops up.
-
First, Make sure it says to save as psp image.
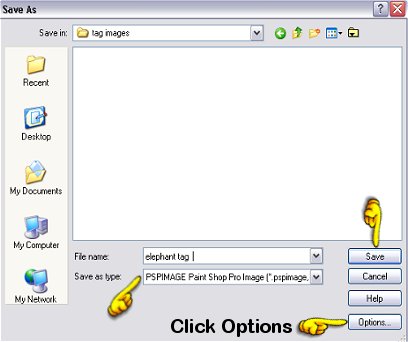
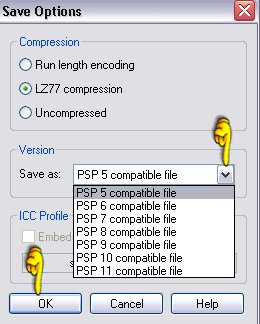
- Second, Click on Options and use the drop down box to select the lowest psp program and click OK. This will allow you to open the image using any psp program.
- Third, Browse to where you want to save this and
- Fourth, Give your image a name.
- Fifth, Click on Save
- 17. Close out your image and Close your PSP program.
~~~~~~~~~~~~~~~~
Animating Your Glitter Tag
~~~~~~~~~~~~~~~~
Tutorials Index
This tutorial was written by
Cathie for PSP Times Three.
Any similarities to other tutorials is merely a coincidence.
©
PSP Times Three
~October 2006~