|

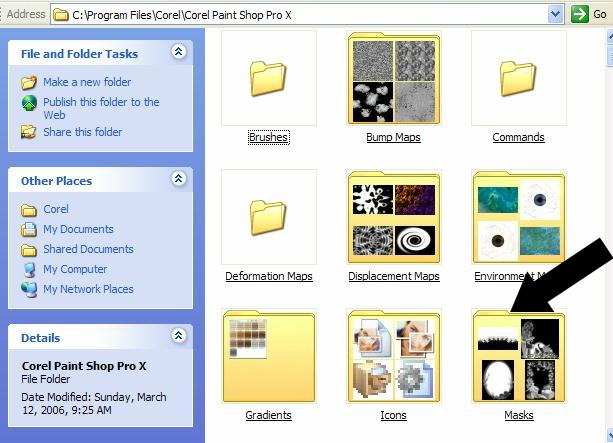
Mask Effects

Download
supplies
here - includes the Frayed
Edge Mask, Polonaise Font and
NeneThomasFairy Image
1. Place the Frayed Edge
Mask file in your Mask folder of
your PSP files.
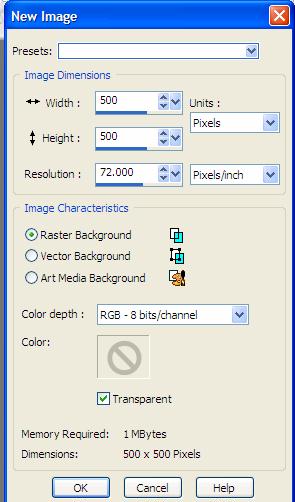
2
Open PSP. Create New Image, 500
x 500.
3
Flood fill with black using your
flood fill tool 
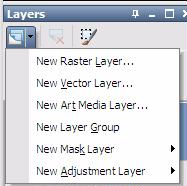
4.
Create a new Raster Layer. Click
on the down arrow on your layer
palette.
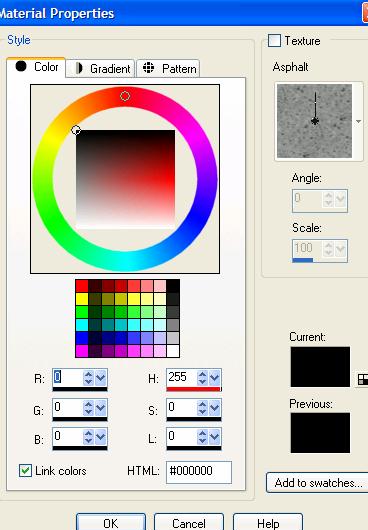
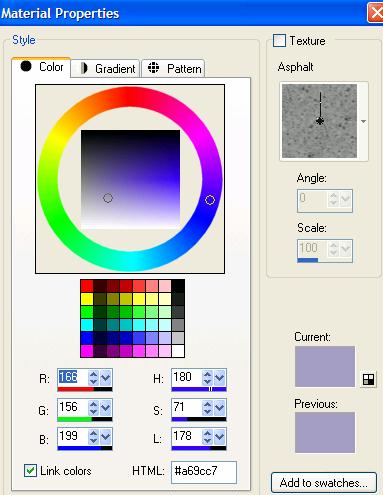
5.
Flood Fill this layer with Color
#a69cc7
We
are going to load our
Mask. First I just
wanted to explain what a
mask is. An easy way
to think of masks is like stencils. Masks allow you to blend one picture
with another.
You can achieve some great effects using masks. |
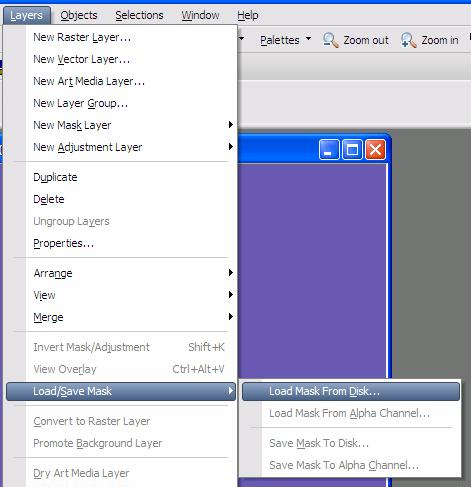
6.
Go to Layers - Load/Save
Mask Load Mask From Disk
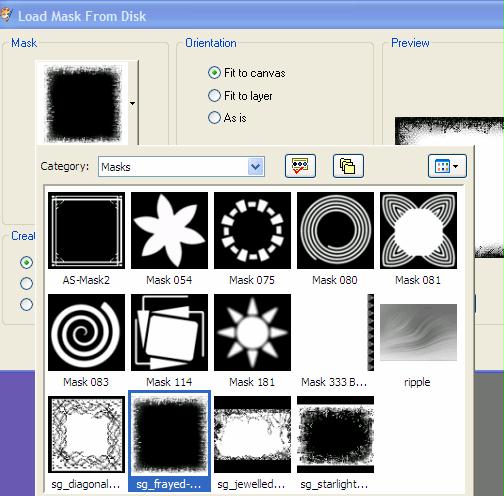
7.
On the drop down list Mask –
Choose the sg_Frayed-Edge Mask
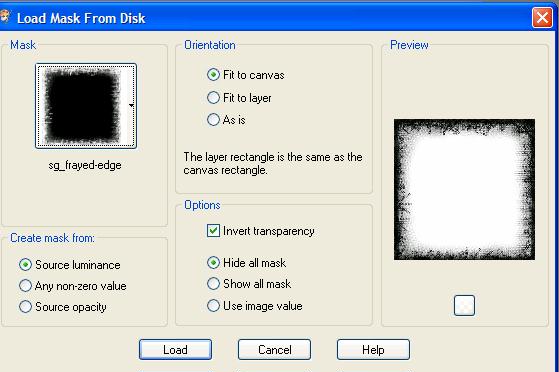
8.
Make sure that your settings
match mine
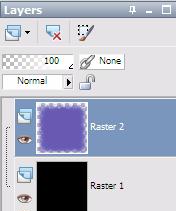
9.
This is what your layer palette
should look like
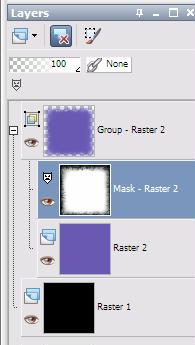
10.
Highlight your Mask Layer
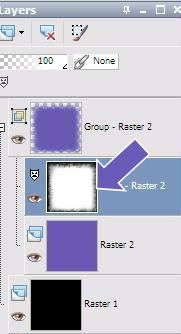
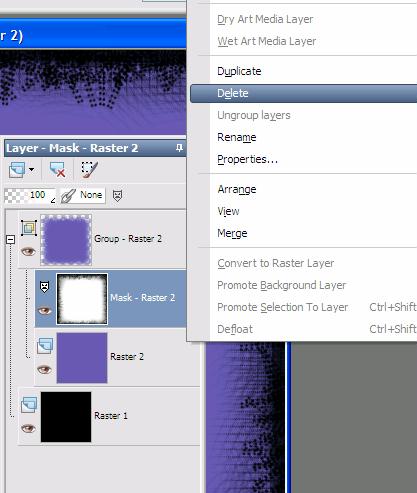
11.
Right Click and delete
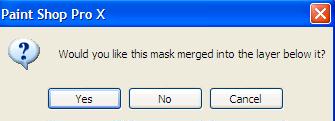
12.
When the pop up question –Would
you like to Merge into the layer
below- Answer Yes
13.
Next – right click on the layer
Group – and choose Ungroup
Layers

14.
Your Layer palette should look
like this
Tutorial Page 2
Tutorial Index Page
|