Preparations:
~~~~~~~~~~~~~~~~
Tutorials Index
This Lesson was written by
Cathie for PSP Times Three.
This lesson will cover basic information about Tags or Codes, along with explaining how to insert some background and text color into your document.

TAGS ARE CODES
Once the notepad opens you can view the Codes used to set the page up. Select the set up Codes you want to use and press Ctrl -C to copy it. Open your notepad and press Ctrl-V to paste the Code. IMPORTANT NOTE: It is ONLY the Code you can copy and paste. DO NOT copy the contents of a page. That is STEALING and violates the author's/owner's copyright.
LET'S ADD SOME COLOR!
Suppose you have a webset that the background graphic is black and you used white color for you text. One day you discover your background graphic does not appear or cannot be viewed by another browser. Well the visitor sure would be out of luck if you have not set your background color to black. All that would appear would be a white blank screen because your text is in white displayed on the default color of a white background. This can happen and is why you should always assign a background color to your web page unless of course you are using plain white to begin with - like this tutorial has.
This is an example of how the Tag would look setting the background color to black:
<BODY BGCOLOR="#000000">
Not to confuse you but some basic colors can be assigned by replacing the color number with the word - such as "black", "red", "green", "blue" and "cyan". Note that not all browsers may recognize all color names, but they do recognize the RGB (color numbers) Values, so it is advisable to use those.
By default, all browsers display black text on a white background. You can change both but be sure to coordinate the colors. Try to avoid using high contrast colors as they can be difficult on the viewer. Some people find that red text on a black background is very difficult to read. Always preview your selection before posting it on your website.
This is an example of how you would write a Tag for a black background with white text and light grey color for the links:
<BODY BGCOLOR="000000" TEXT="#FFFFFF" LINK="#DEDCDC">
REVIEW
<HTML>
<HEAD>
<TITLE>My PSP Times Three HTML Lessons</TITLE>
</HEAD>
<BODY>
This is my PSP Times Three Homework page for the HTML 101 lessons
</BODY>
</HTML>
ASSIGNMENT
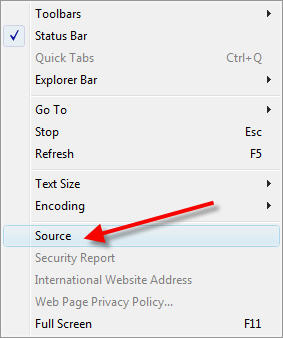
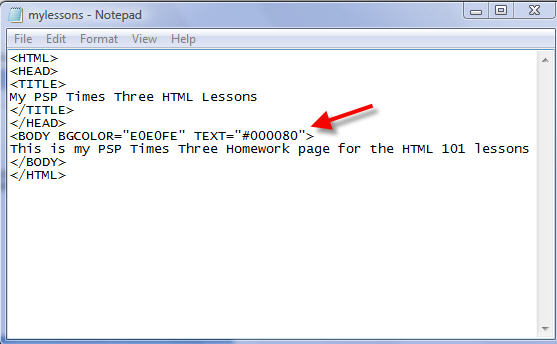
Open your PSP Times Three Lessons HTML Document by double clicking on it and View/Source. Note that where you will be editing your HTML is marked with Red Text here:
<HTML>
<HEAD>
<TITLE>My PSP Times Three HTML Lessons</TITLE>
</HEAD>
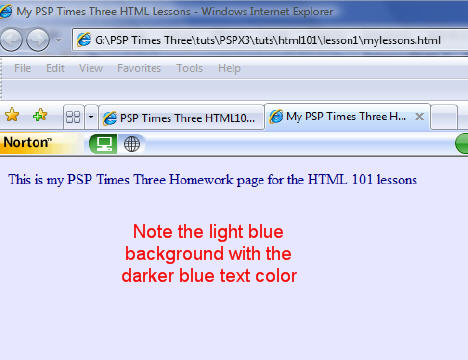
<BODY BGCOLOR="E0E0FE" TEXT="#000080">
This is my PSP Times Three Homework page for the HTML 101 lessons
</BODY>
</HTML>
Now go to your web site and upload your edited document. Once you do that be sure to send your link through our group mail with "HTML Lessons" in the Subject Line.
Keep practicing with the 4 major tags and changing the attributes and values for the background and text colors so you will become familiar with them. Good luck and if you have any questions just send them on to us!
Next lesson you will learn all about the text - size, bold, italic, and font names.
~~~~~~~~~~~~~~~~
Any similarities to other tutorials is merely a coincidence.
©
PSP Times Three
~July 2007~